阿超
>
jenkinsのPipeline项目构建
下载插件

创建一个pipeline项目

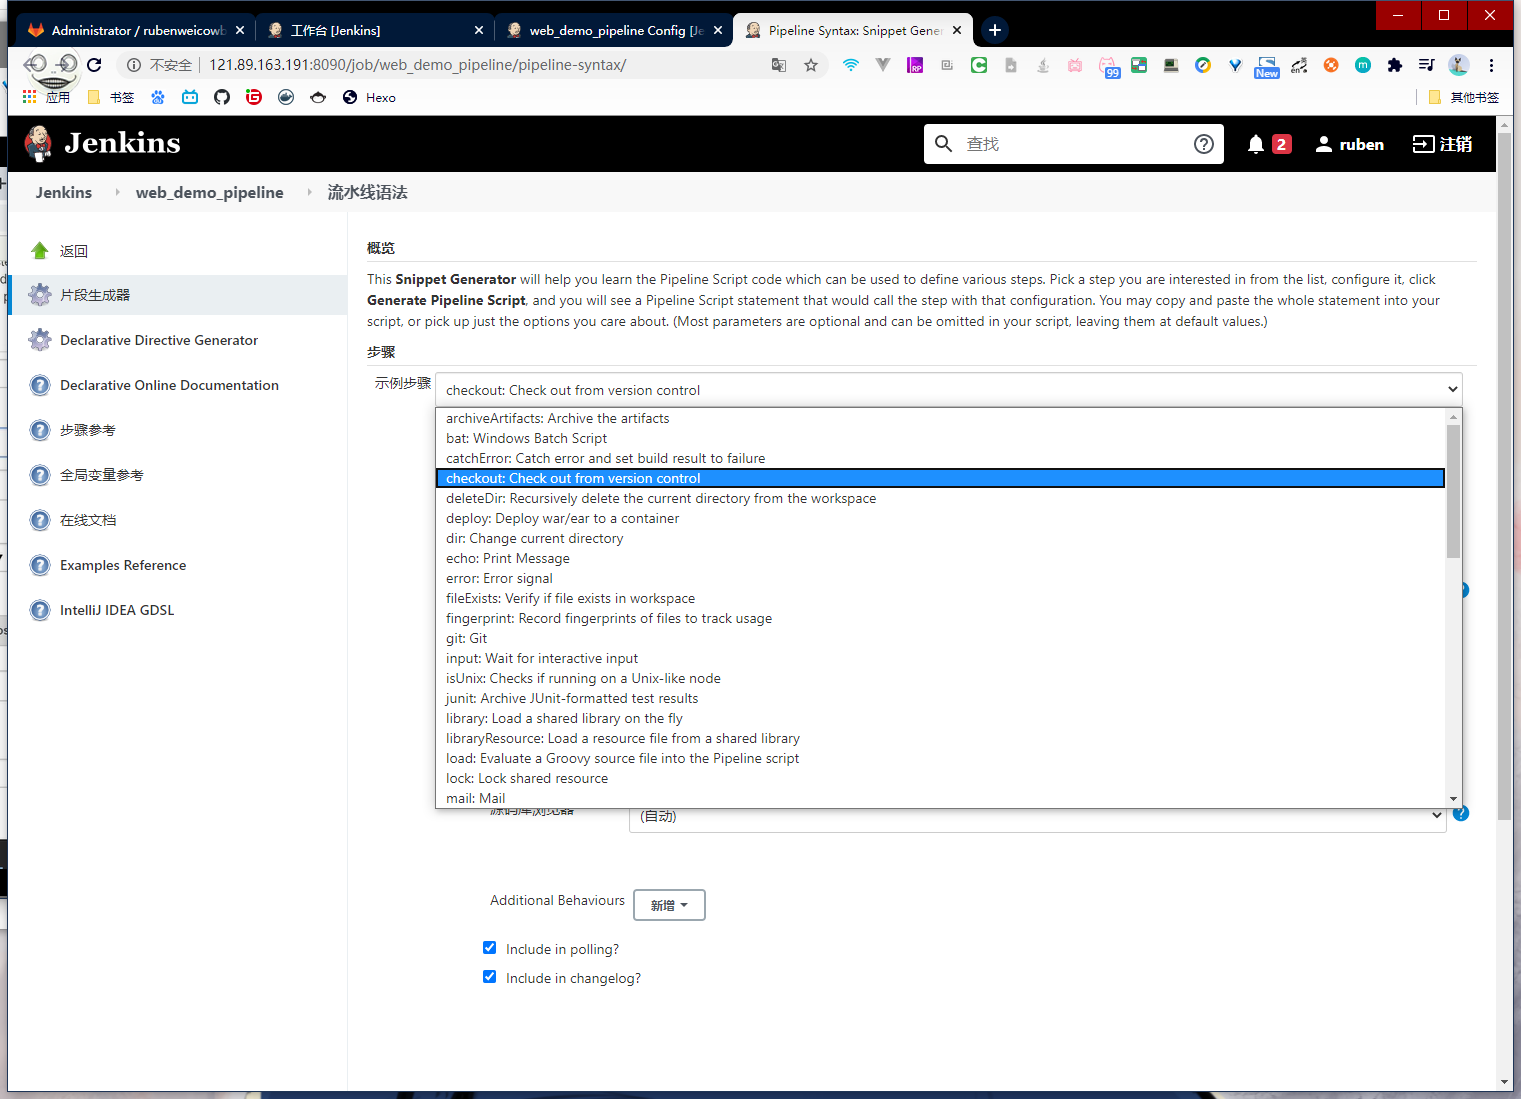
点击下面的流水线语法
到流水线语法的片段生成器里选择Check out from version control
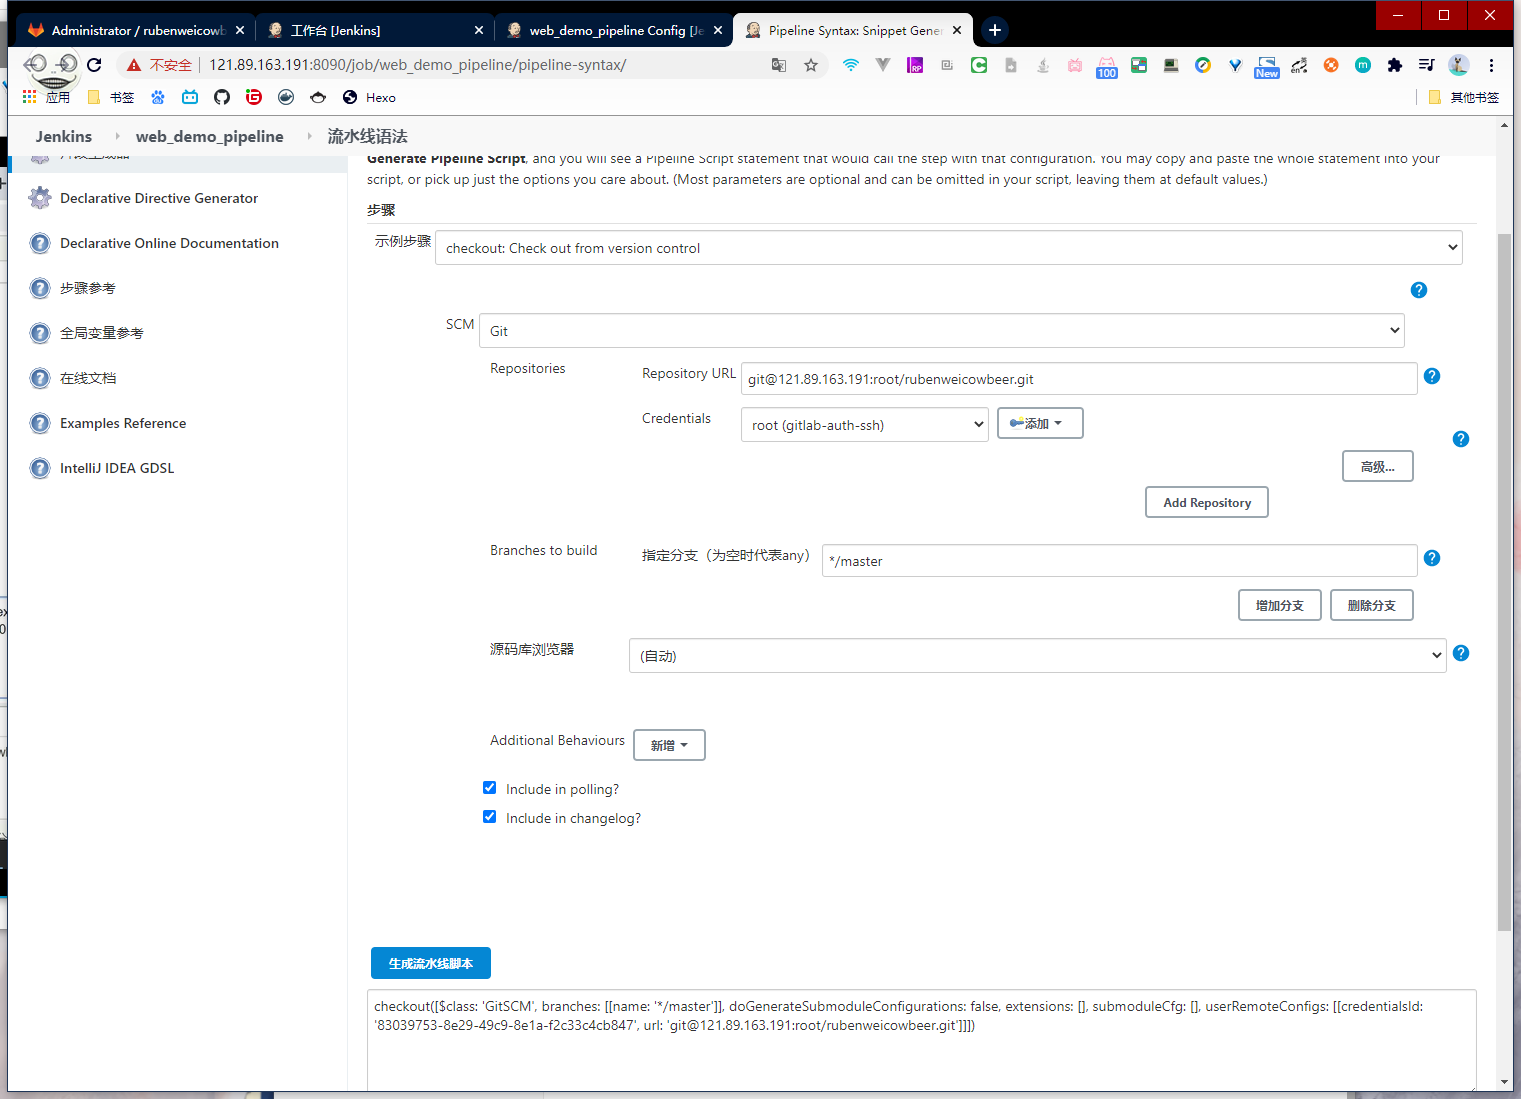
填入仓库和凭证,生成脚本
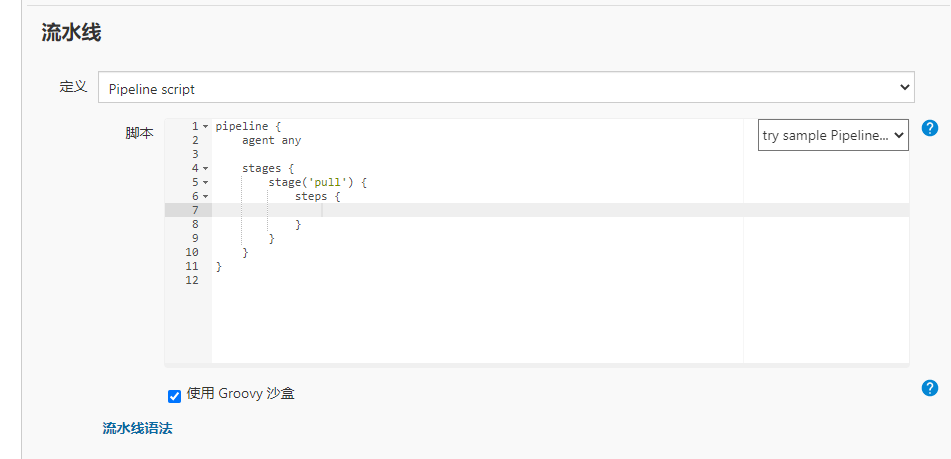
复制到pipeline脚本里去
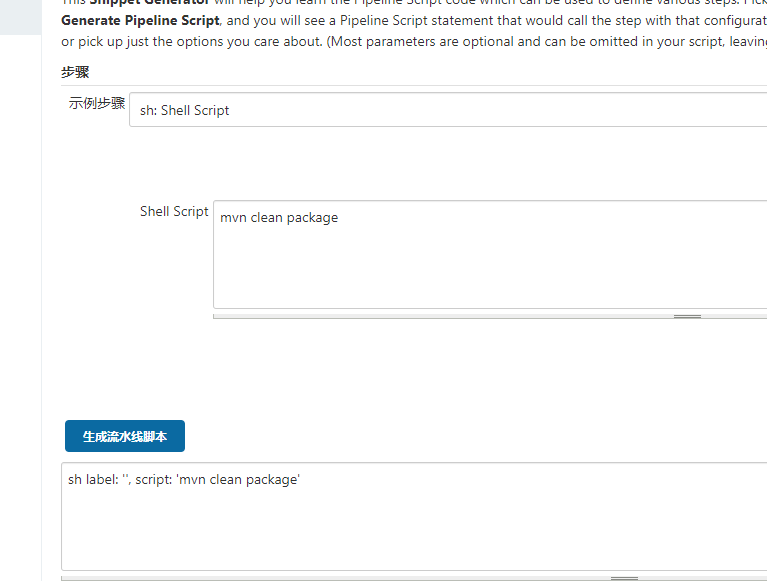
然后选择sh:Shell script,生成脚本,复制
然后再选择deploy:Deploy war/ear to a container
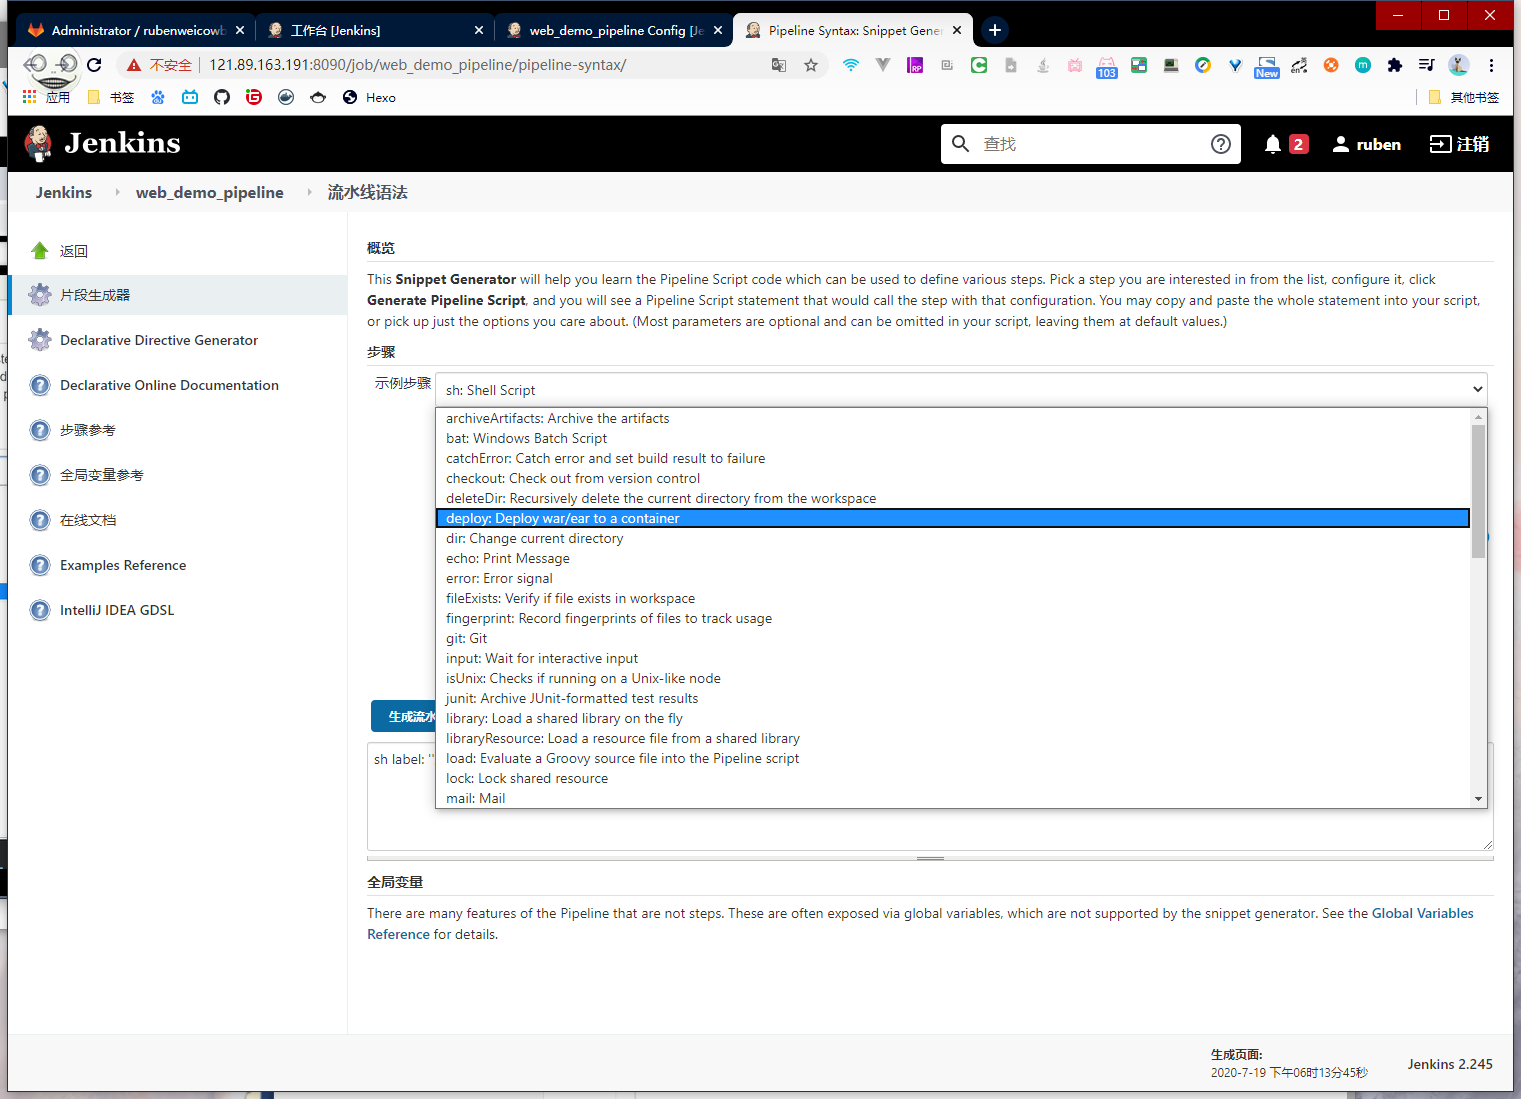
然后填写参数,生成
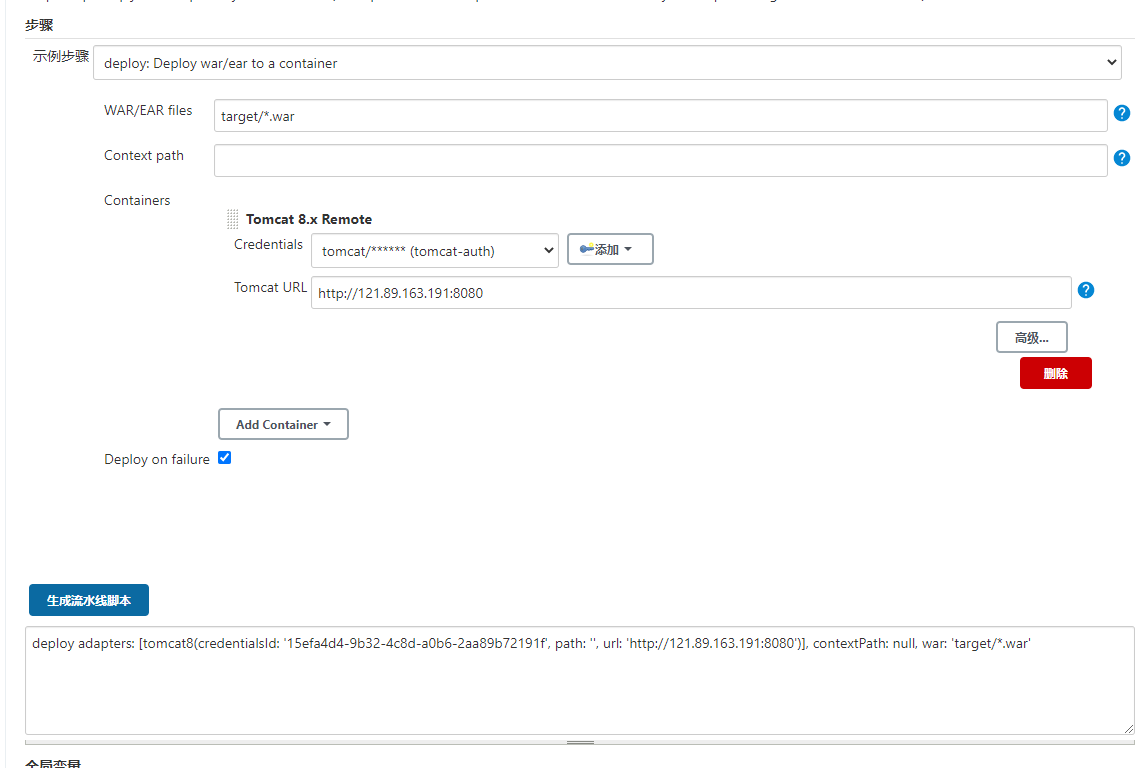
最后的样子就是这样
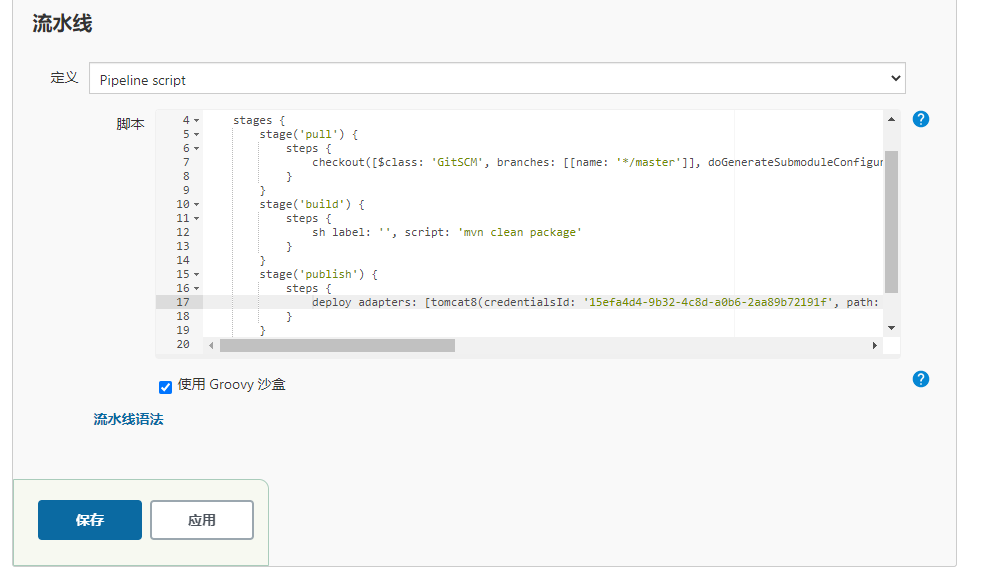
完整脚本
1
2
3
4
5
6
7
8
9
10
11
12
13
14
15
16
17
18
19
20
21
| pipeline {
agent any
stages {
stage('pull') {
steps {
checkout([$class: 'GitSCM', branches: [[name: '*/master']], doGenerateSubmoduleConfigurations: false, extensions: [], submoduleCfg: [], userRemoteConfigs: [[credentialsId: '83039753-8e29-49c9-8e1a-f2c33c4cb847', url: 'git@121.89.163.191:root/rubenweicowbeer.git']]])
}
}
stage('build') {
steps {
sh label: '', script: 'mvn clean package'
}
}
stage('publish') {
steps {
deploy adapters: [tomcat8(credentialsId: '15efa4d4-9b32-4c8d-a0b6-2aa89b72191f', path: '', url: 'http://121.89.163.191:8080')], contextPath: null, war: 'target/*.war'
}
}
}
}
|
然后就可以保存,构建了
如果我们想把pipeline脚本用文件的形式保存在项目目录
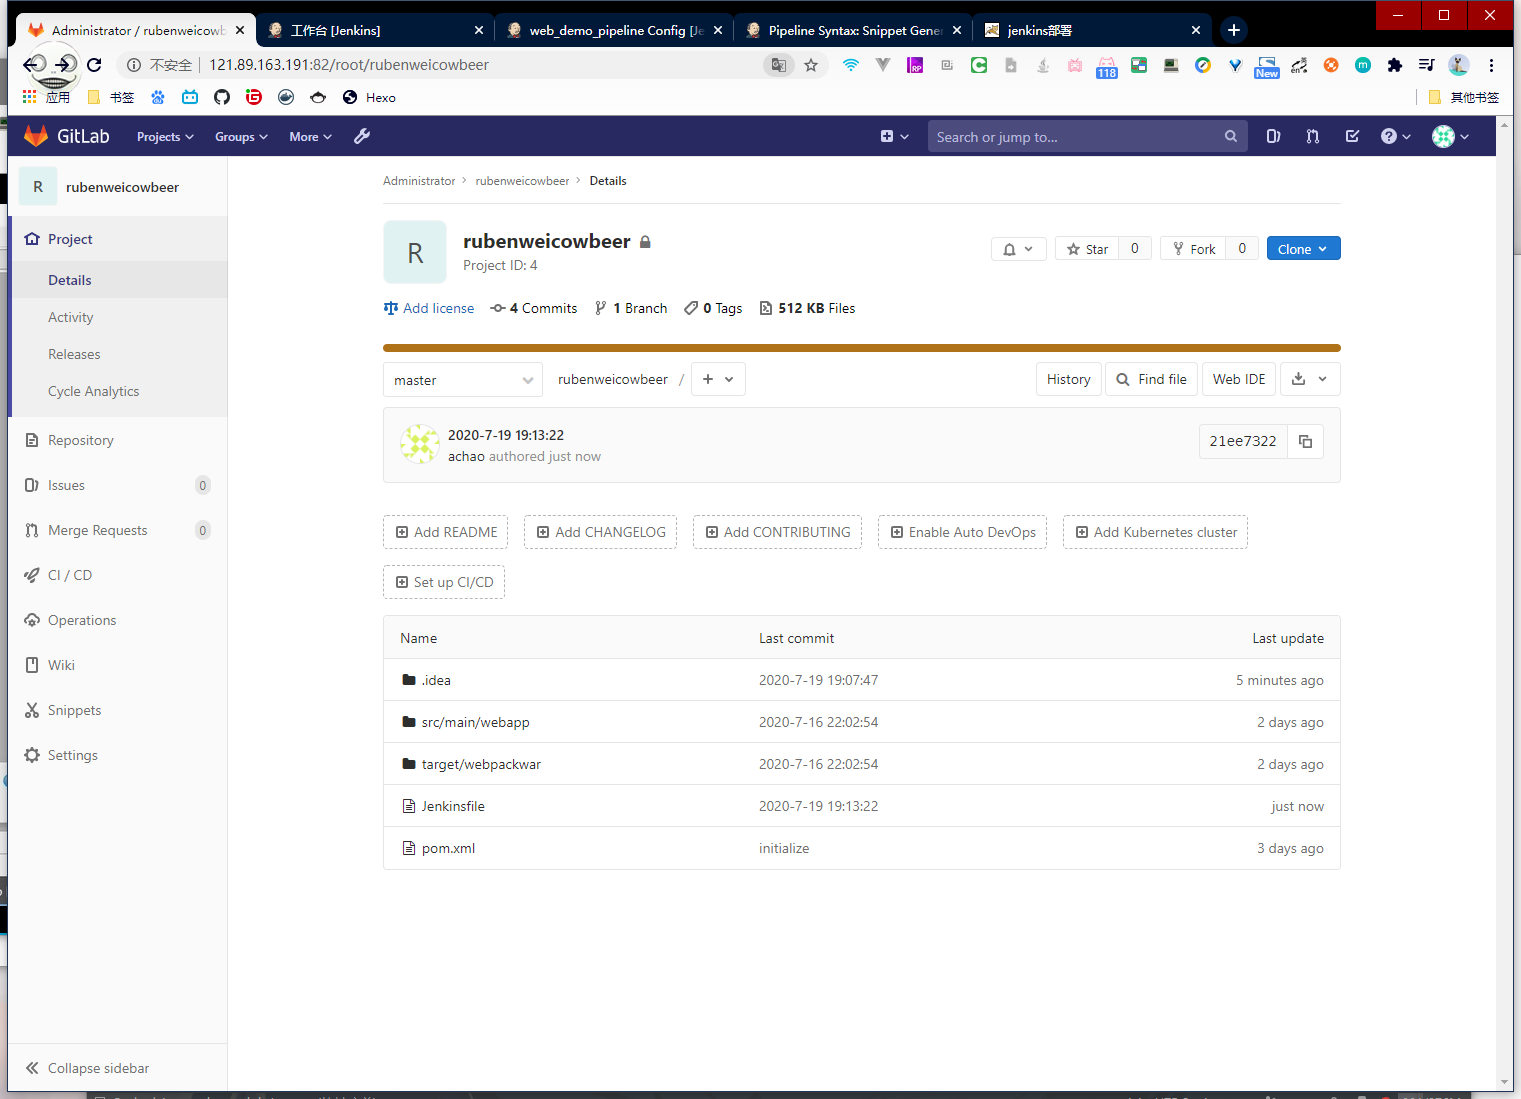
那么我们就可以创建一个Jenkinsfile并粘入我们的pipeline脚本
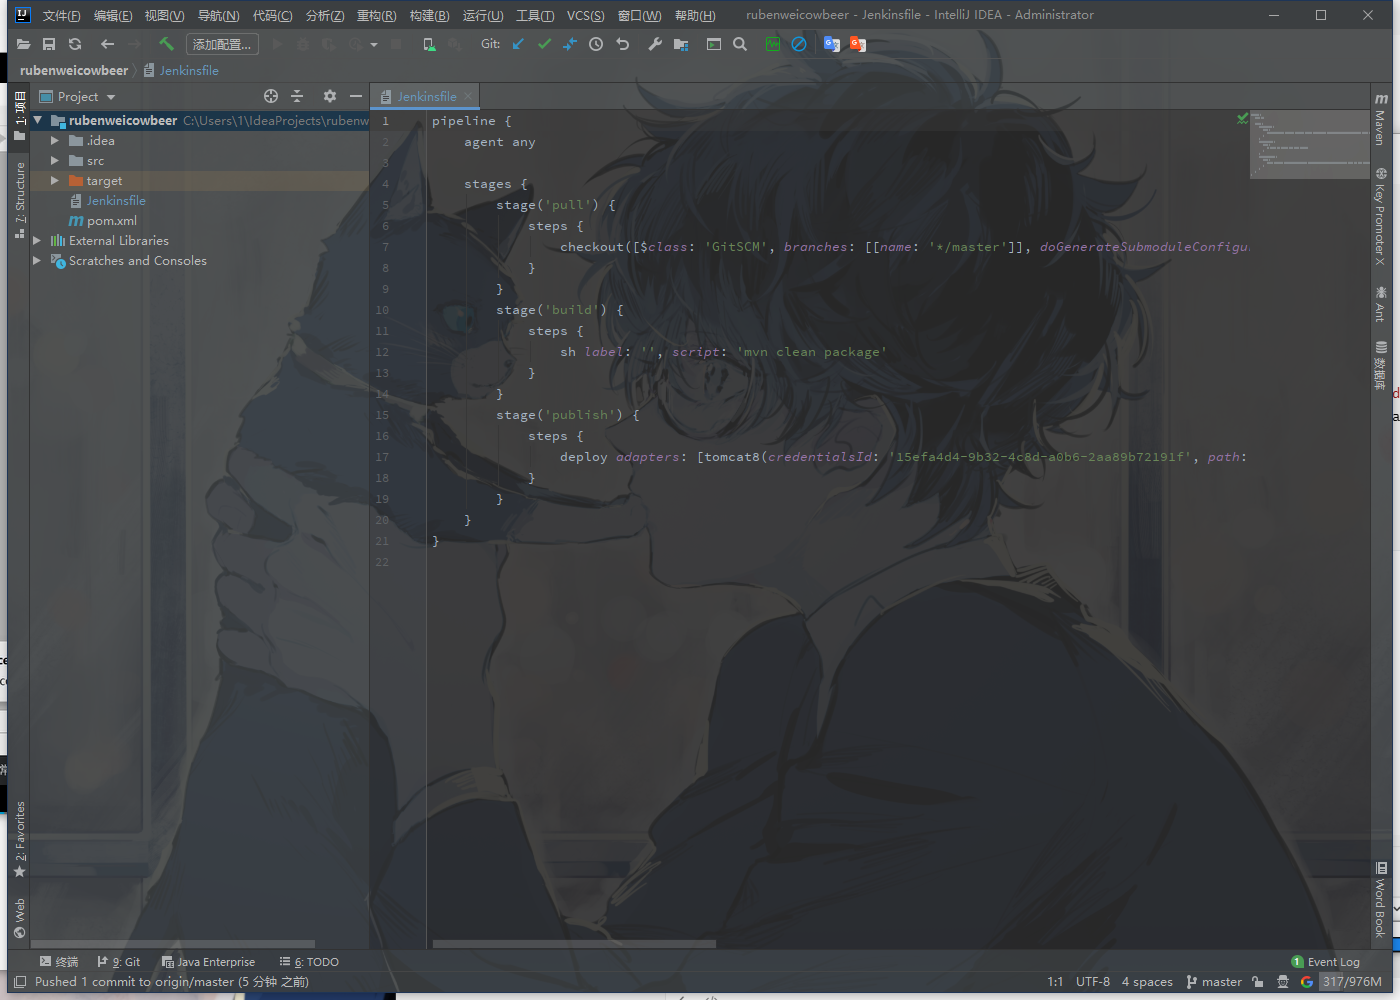
push之后发现已经有了
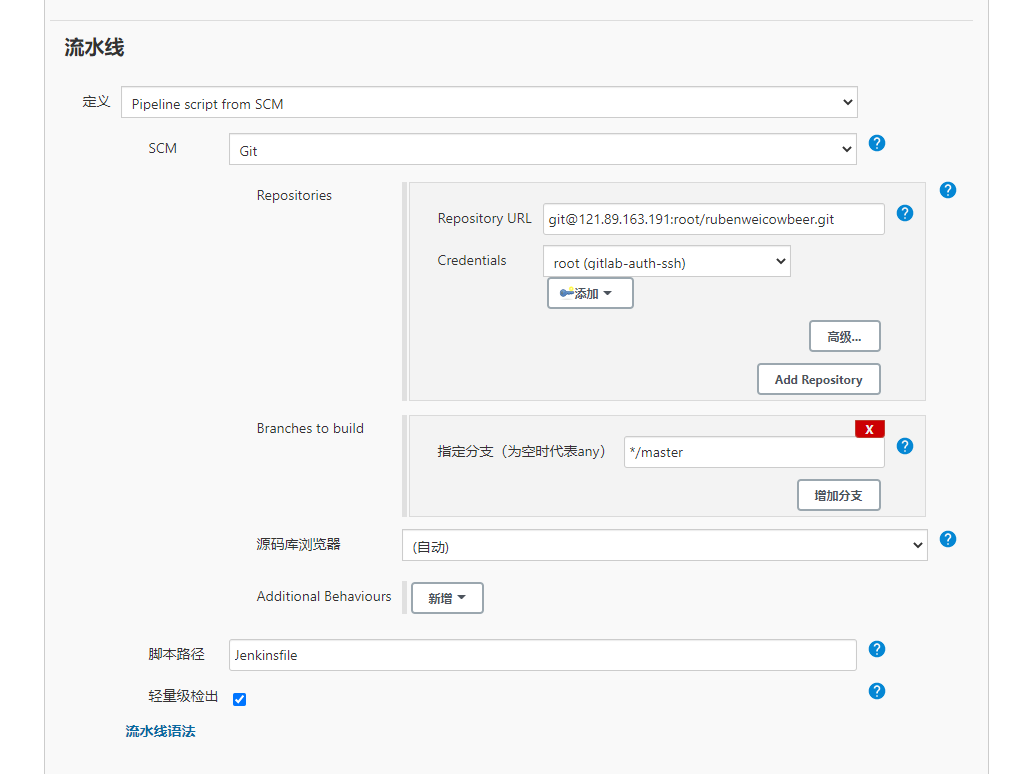
然后选择Pipeline script from SCM

填写配置
然后构建


