
程序化的事件侦听器
吾心信其可行,则移山填海之难,终有成功之日。——孙中山
我们可以使用this.$on在vue中侦听一个事件
1 | vm.$on('test', function (msg) { |
然后我们可以在其他地方访问它
1 | vm.$emit('test', 'hi') |
例如这里,我在一个页面中使用vm.$on

而在另一处中使用vm.$emit
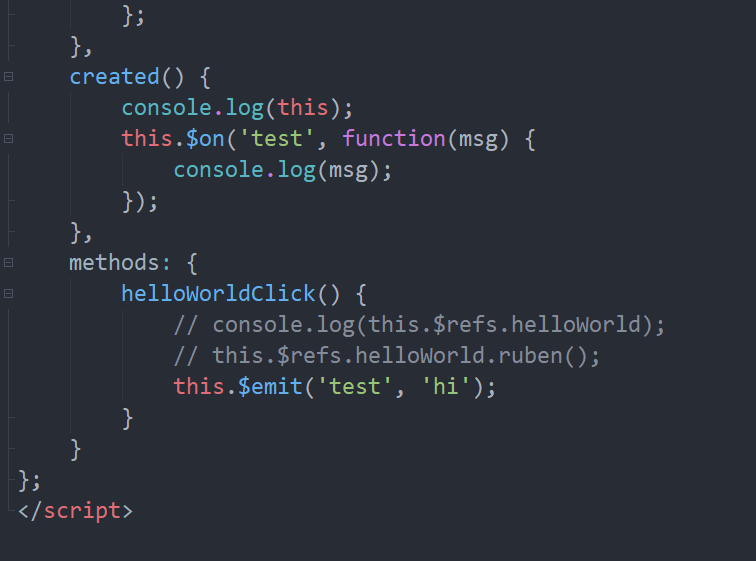
可以看到成功调用test事件
基于这一点,我们可以在uniapp中进行页面间的通信
也就是说,在其中一个页面中我们使用uni.$on或者uni.$once,在另一个页面中就可以使用uni.$emit进行调用,前提是uni,$on或者uni.$once必须触发成功
uni.$once触发后就会立马移除该监听器,也就是说只能触发一次
而uni.$on就只能使用uni.$off进行手动移除
比如我这里在index.nvue页面中挂载
1 | <template> |
然后到list页面中调用
1 | <template> |
我们进入index页面,再进入list页面触发后,回到index页面就可以看到它的add函数成功触发了每秒加2的效果