1.安装相关依赖
1 yum -y install policycoreutils openssh-server openssh-clients postfix
2.启动ssh服务&设置为开机启动
1 systemctl enable sshd && sudo systemctl start sshd
3.设置postfix开机自启,并启动,postfix支持gitlab发信功能
1 systemctl enable postfix && sudo systemctl start postfix
如果报这个错
1 Job for postfix.service failed because the control process exited with error code. See "systemctl status postfix.service" and "journalctl -xe" for details.
可以采取以下解决方案
1
2
3
4
# 修改 /etc/postfix/main.cf的设置 # 别写反了。。。
4.开放ssh以及http服务,然后重新加载防火墙列表
1
2
3
firewall-cmd --add-service=ssh --permanent
5.下载gitlab包,并且安装
1
2
3
# 在线下载安装包
6.修改gitlab配置
1 vi /etc/gitlab/gitlab.rb
修改gitlab访问地址和端口,默认80,我们改成82,改这两处
1
2
external_url 'https://121.89.163.191:82'
7.重载配置及启动gitlab
1
2
gitlab-ctl reconfigure
8.把端口添加到防火墙
1
2
firewall-cmd --zone=public --add-port=82/tcp --permanent
如果一直502,查看8080端口是否被占用
1
2
3
4
# 查看端口 # 停止端口
之后重启
进去了后改密码…
左上角创建一个group(有手就行)
new project
创建项目,8088端口
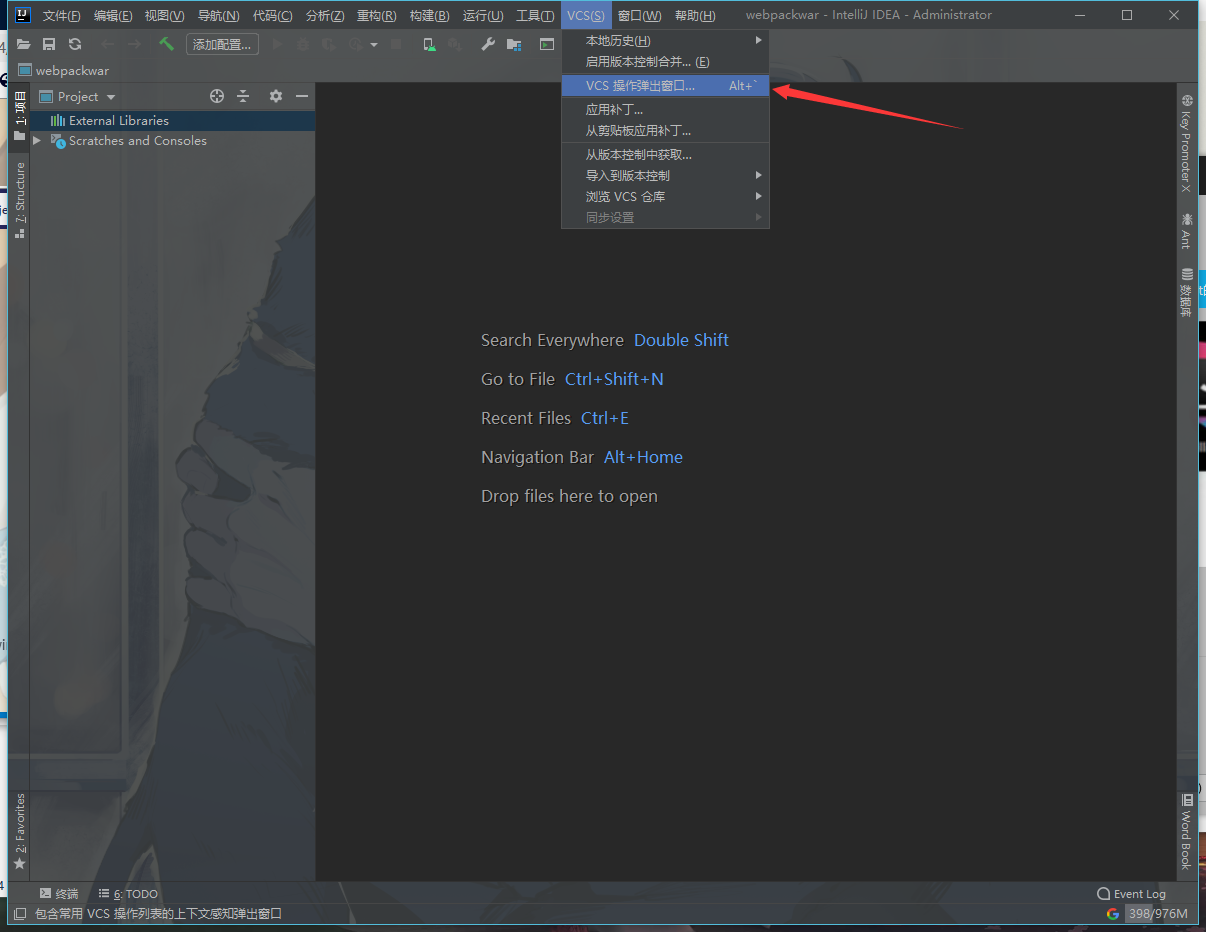
然后在idea的
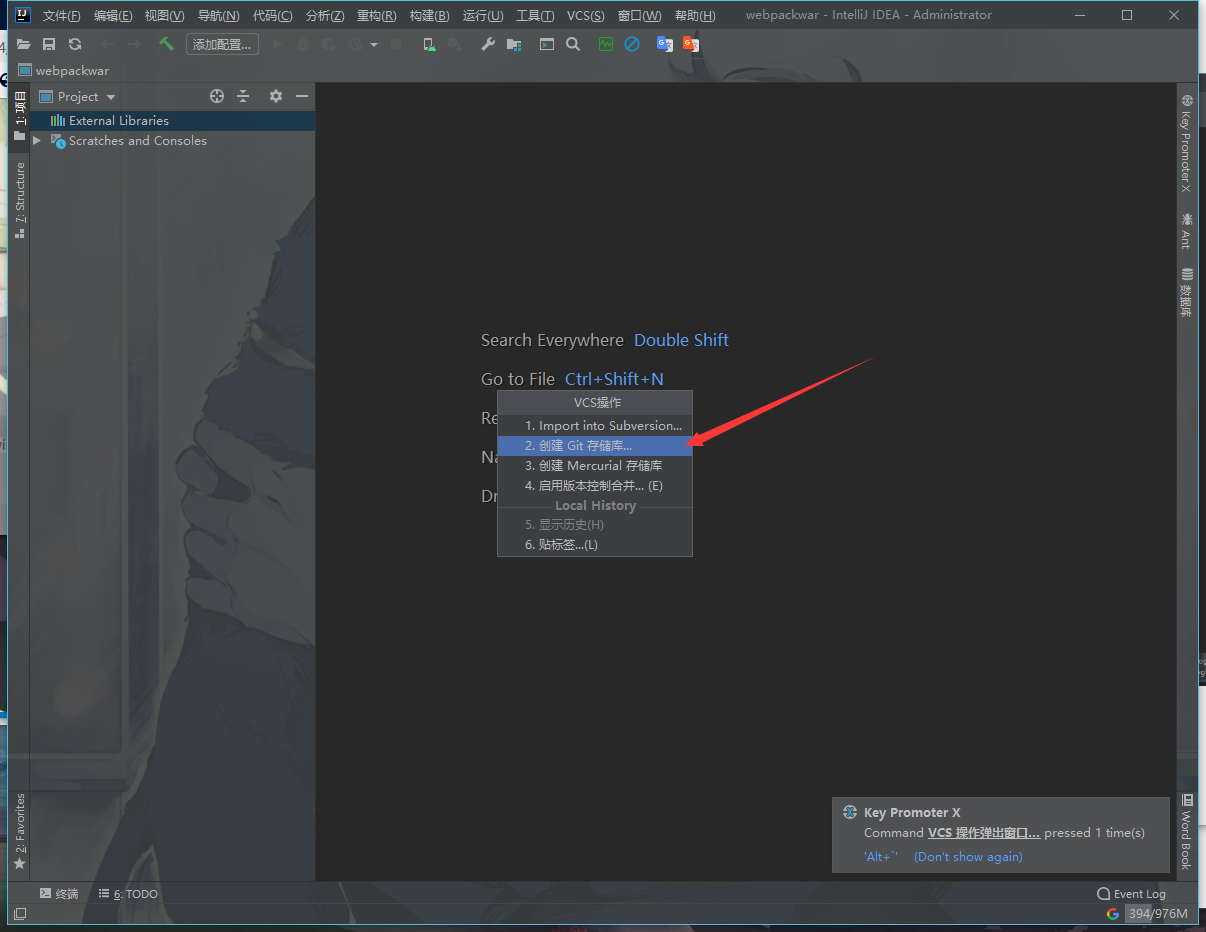
VCS->Enable Version Control Integration…
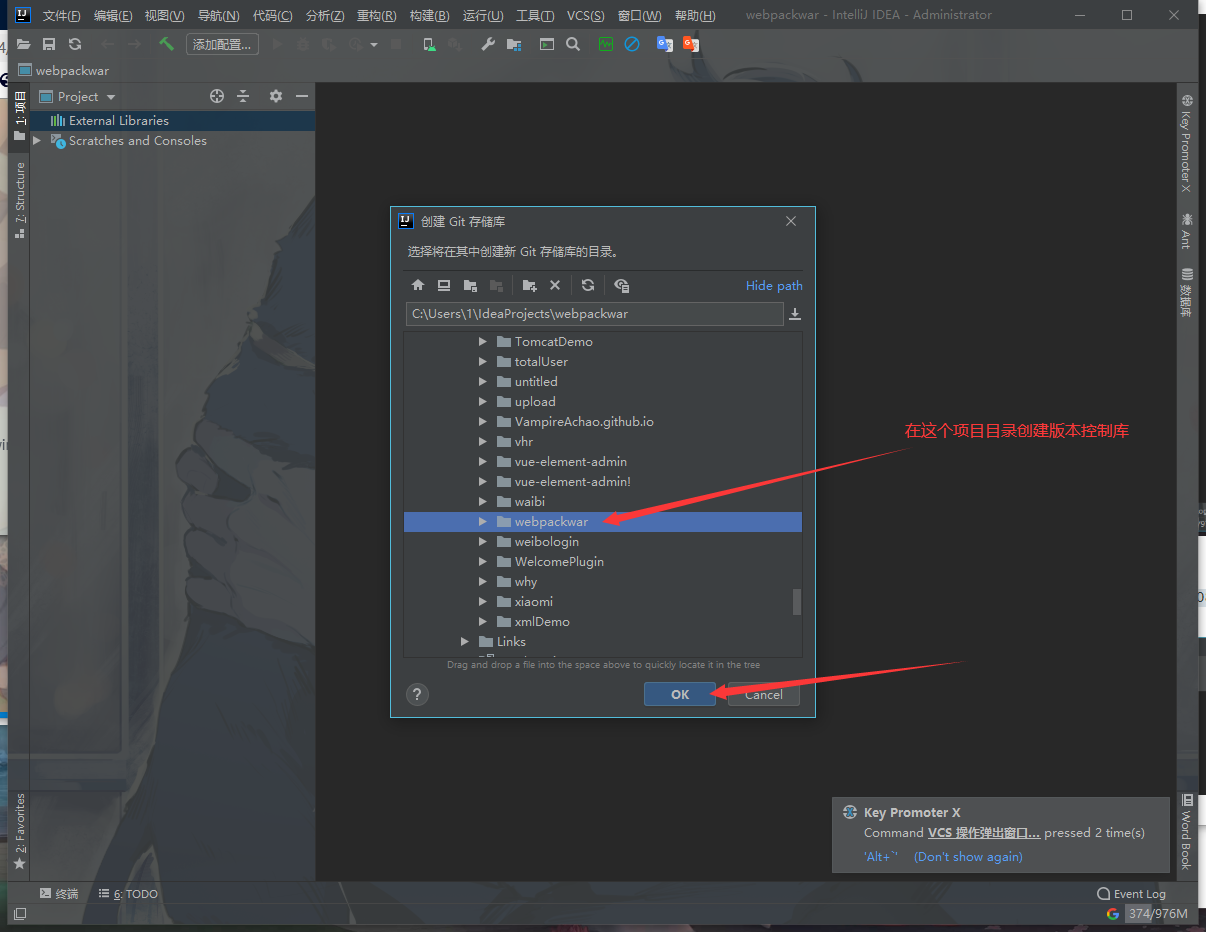
打开后选择Git创建版本控制库
开始写代码
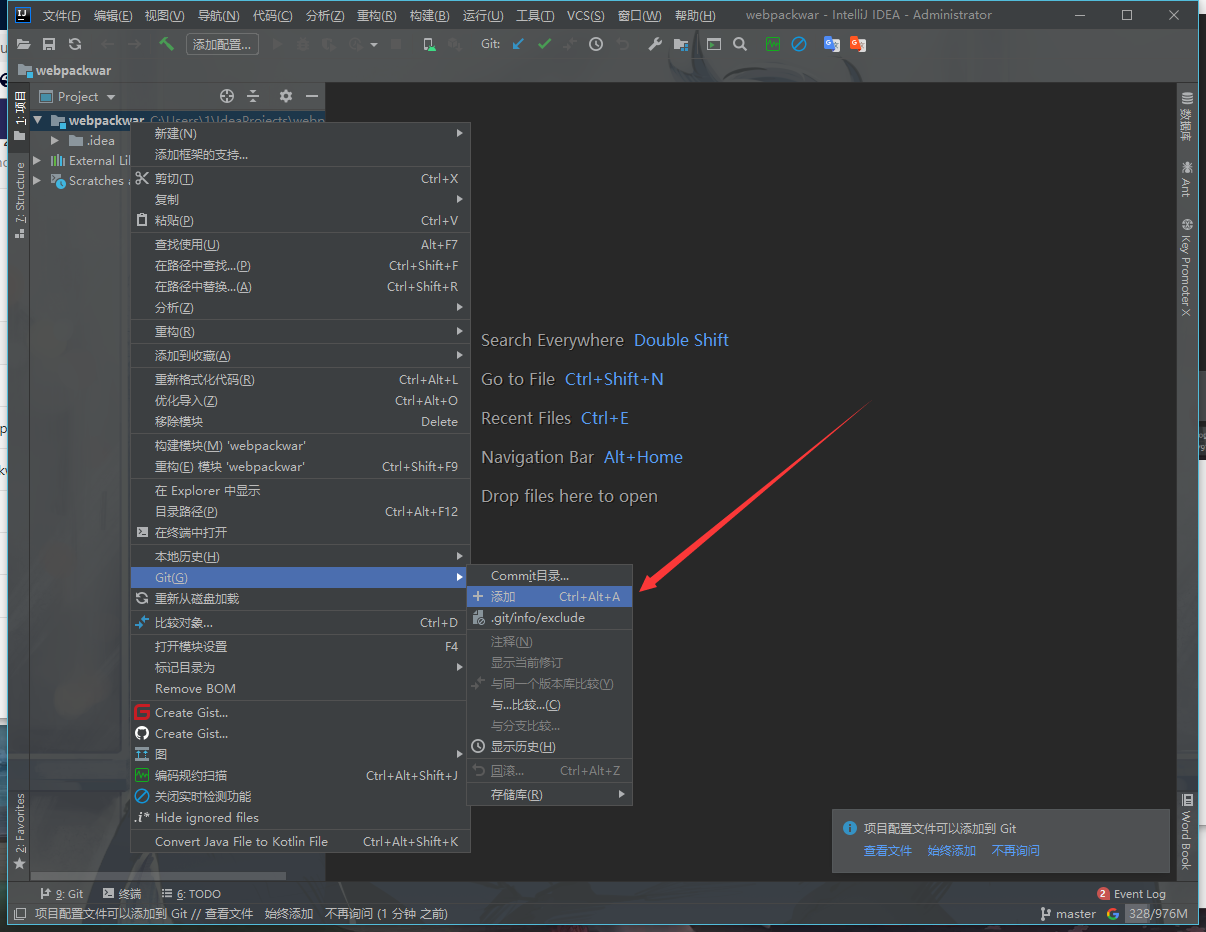
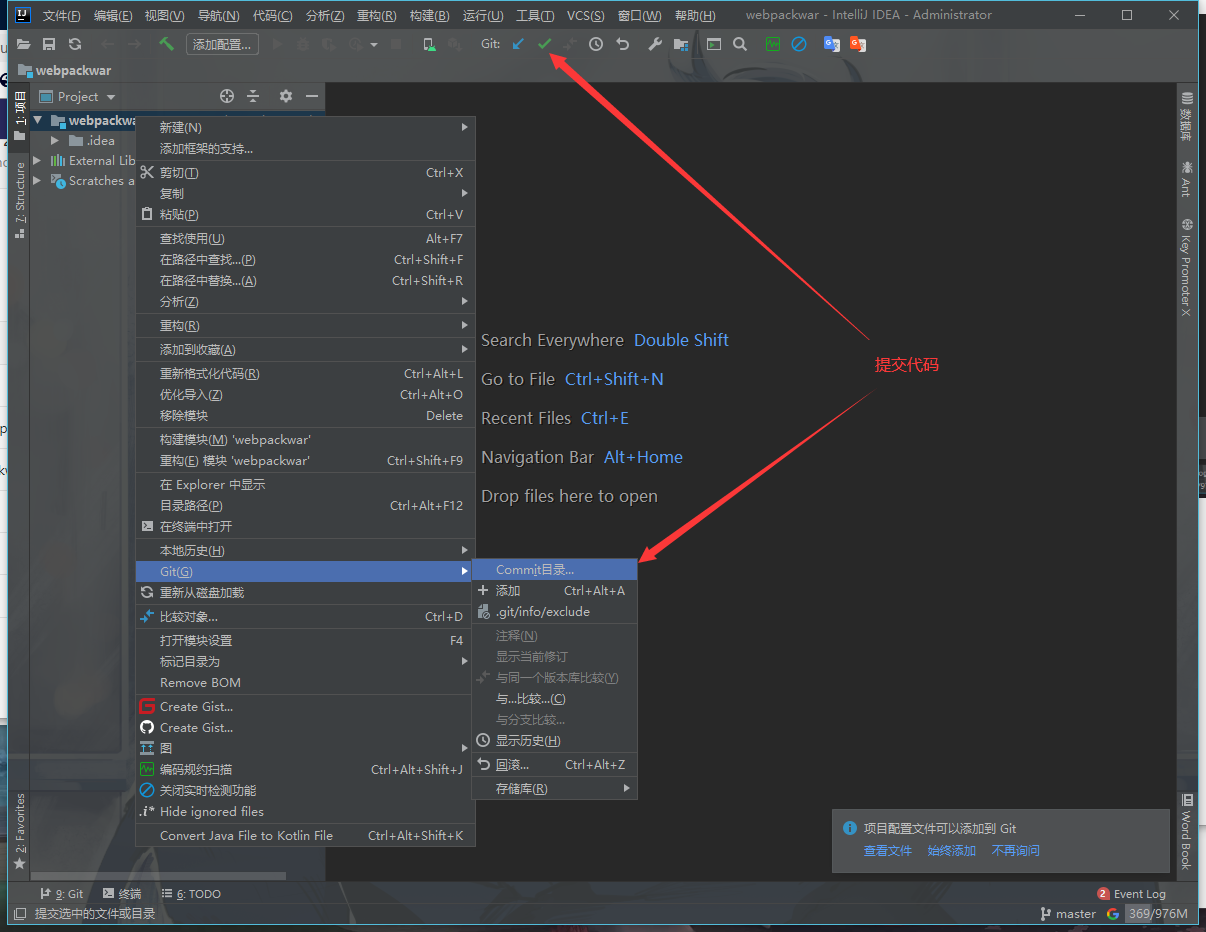
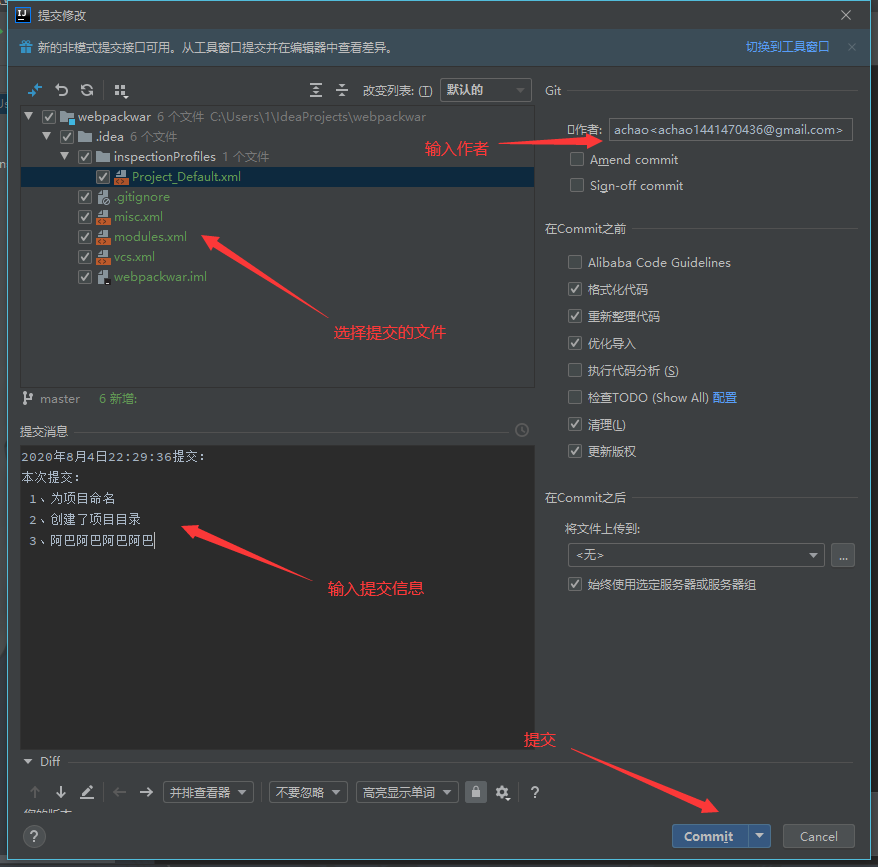
然后右键项目根路径Add代码,commit代码…
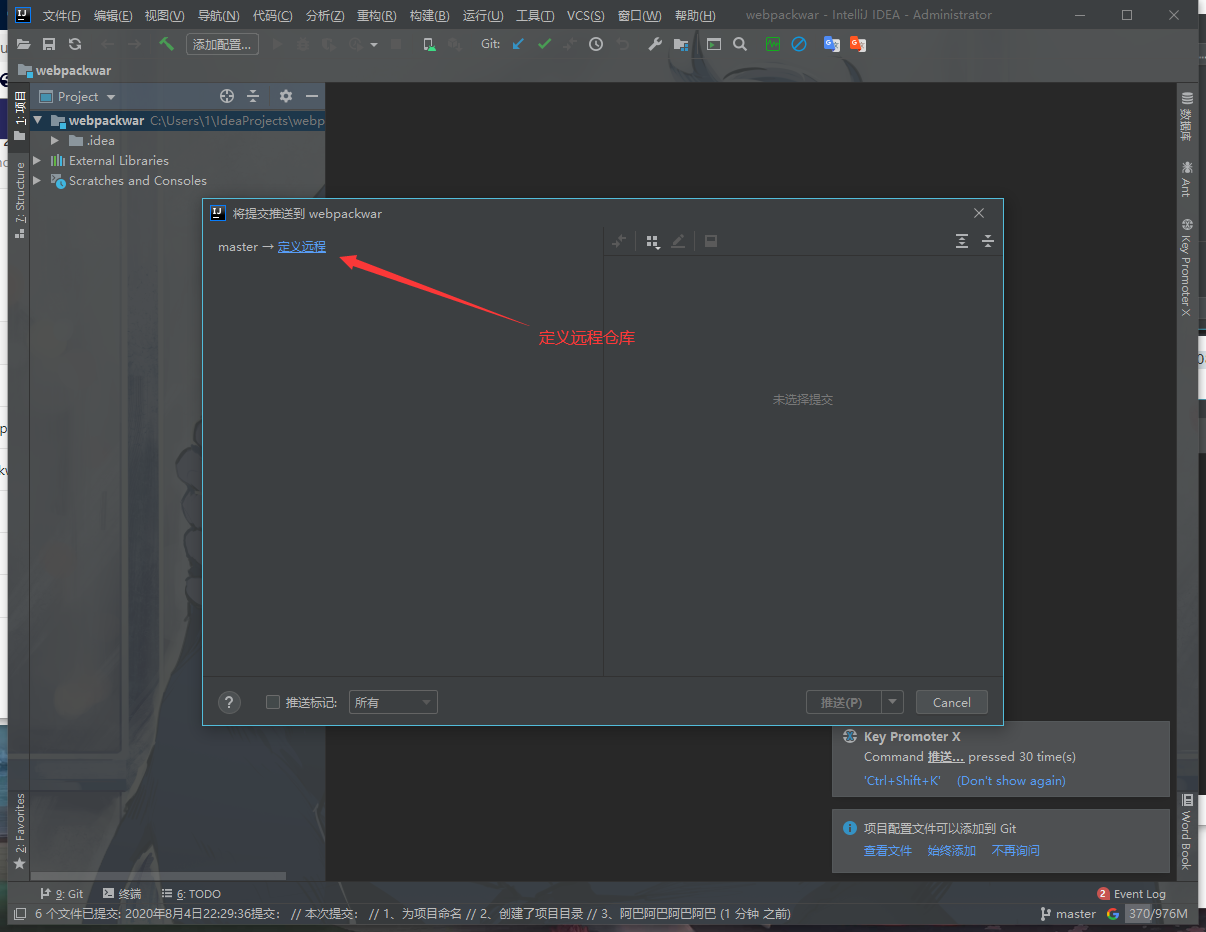
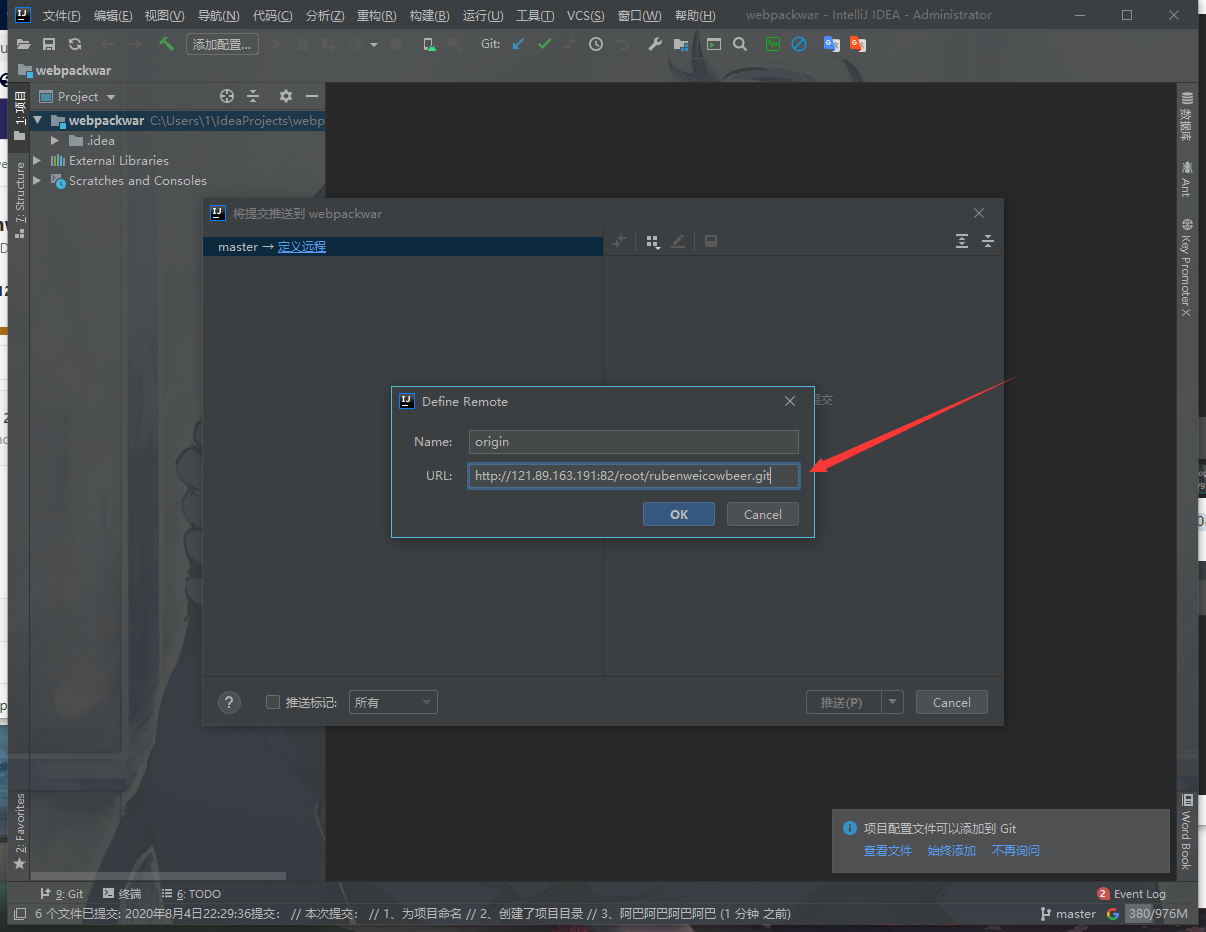
以及Remotes里添加我们的远程仓库
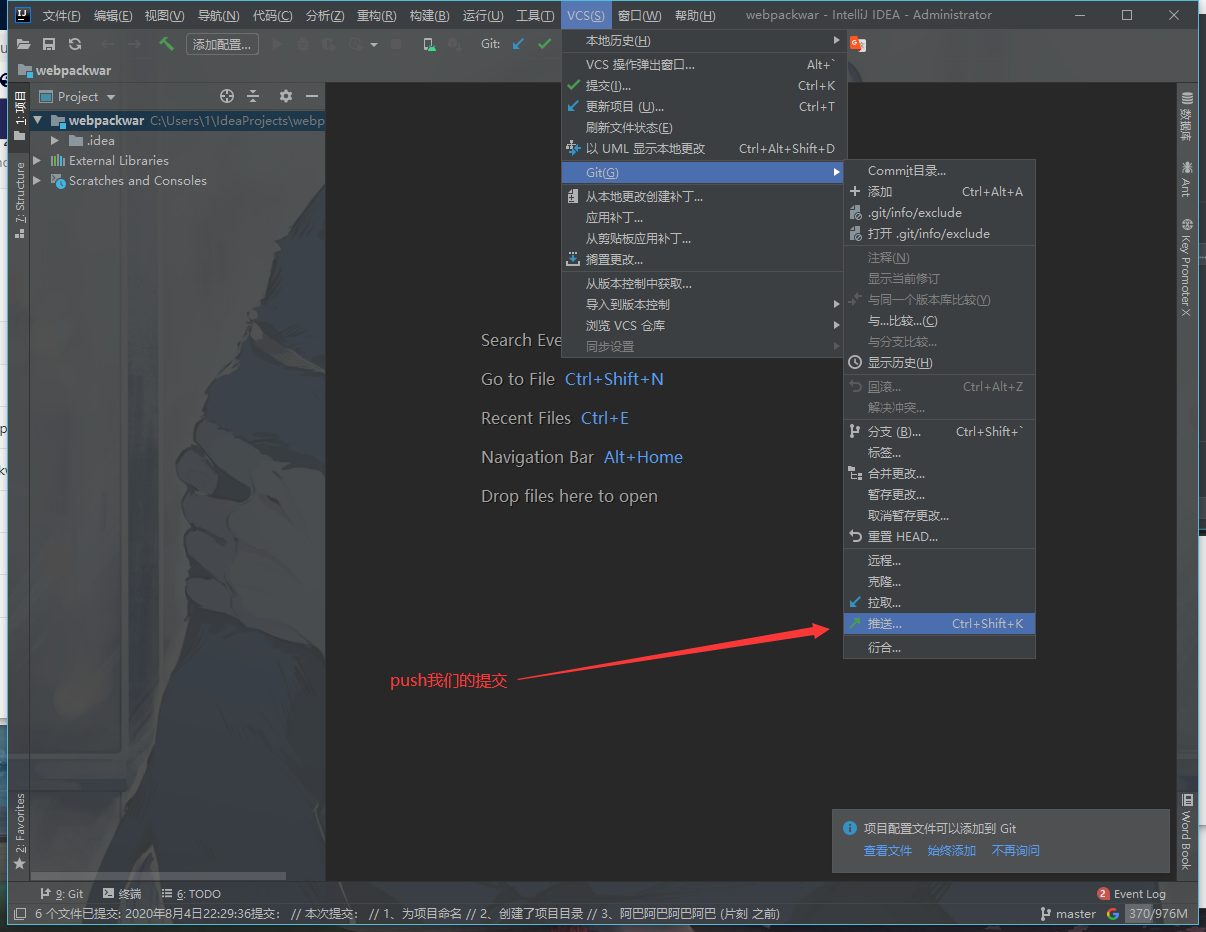
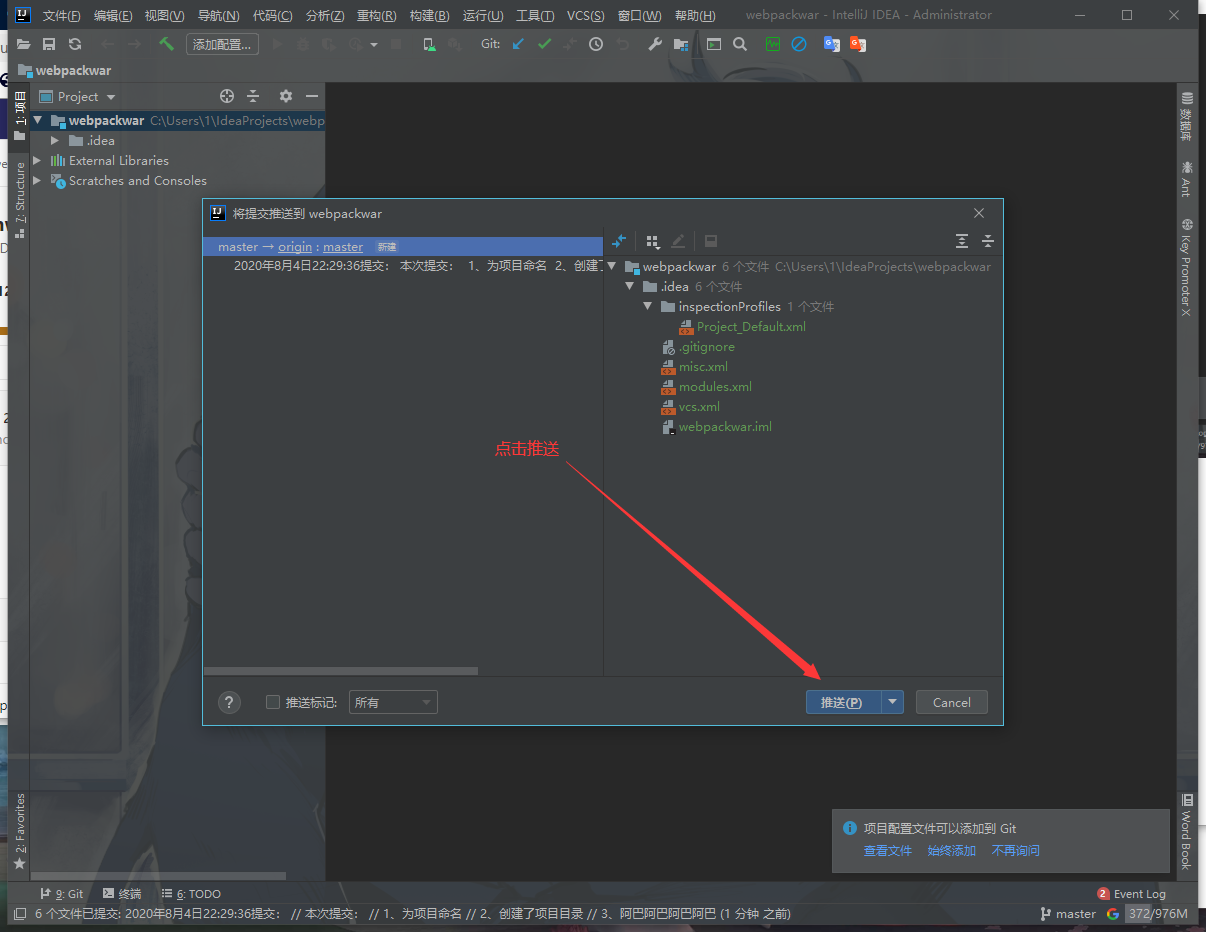
push
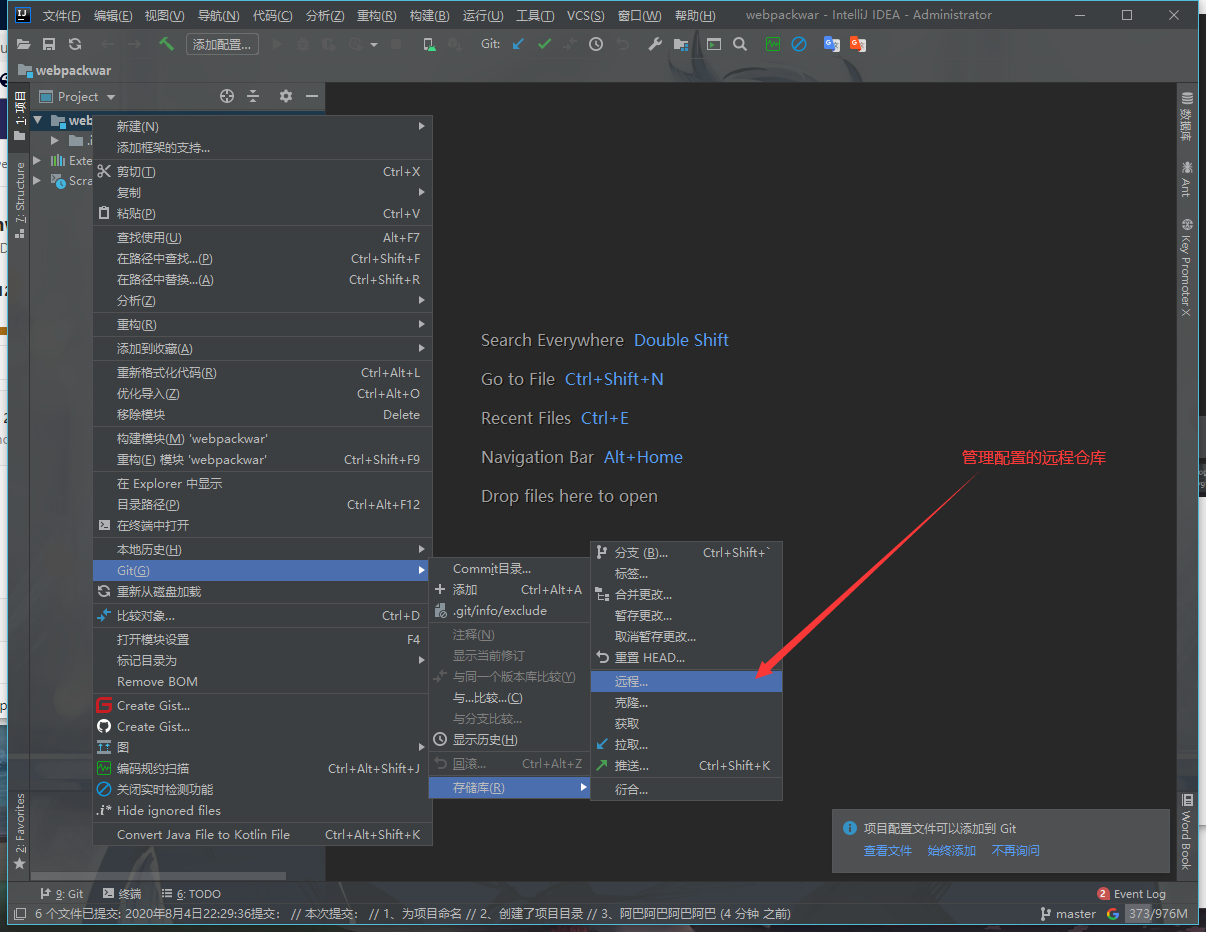
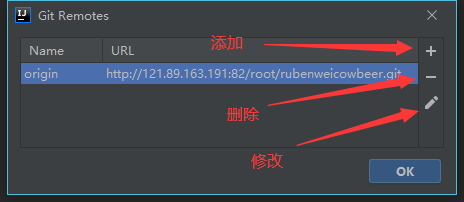
也可以去管理远程仓库
对了,中途弹出的输入用户名和密码
如果密码输错了,可以去
windows控制面板->用户账户->凭据管理器找到windows凭据
然后删除对应的凭据就行了

