我们杀人不用愤怒,而用笑。——尼采。
按照官方文档步骤
首先引入GAV:
1
2
3
4
5
| <dependency>
<groupId>p6spy</groupId>
<artifactId>p6spy</artifactId>
<version>最新版本</version>
</dependency>
|
然后是修改配置:
注意此处协议前加上p6spy
驱动也要改为P6SpyDriver
1
2
3
4
5
6
7
| spring:
datasource:
driver-class-name: com.p6spy.engine.spy.P6SpyDriver
username: xxx
password: xxx
url: jdbc:p6spy:mysql://localhost:3306/ruben?autoReconnect=true&zeroDateTimeBehavior=CONVERT_TO_NULL&useUnicode=true&characterEncoding=utf-8&useSSL=false&nullCatalogMeansCurrent=true&serverTimezone=Asia/Shanghai&allowMultiQueries=true&allowPublicKeyRetrieval=true
...
|
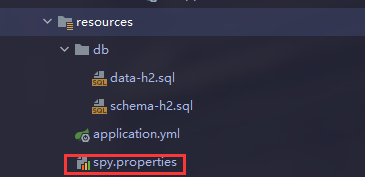
然后放入日志配置文件spy.properties到resources目录下

1
2
3
4
5
6
7
8
9
10
11
12
13
14
15
16
17
18
19
20
21
22
|
modulelist=com.baomidou.mybatisplus.extension.p6spy.MybatisPlusLogFactory,com.p6spy.engine.outage.P6OutageFactory
logMessageFormat=com.baomidou.mybatisplus.extension.p6spy.P6SpyLogger
appender=com.baomidou.mybatisplus.extension.p6spy.StdoutLogger
deregisterdrivers=true
useprefix=true
excludecategories=info,debug,result,commit,resultset
dateformat=yyyy-MM-dd HH:mm:ss
outagedetection=true
outagedetectioninterval=2
|
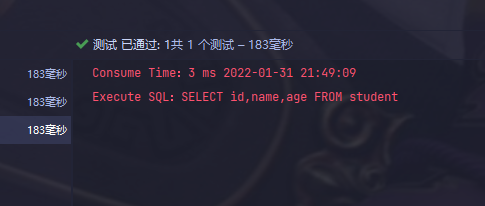
接下来我们执行查询测试一下可以看到确实输出SQL分析日志


