任何问题都有解决的办法,无法可想的事是没有的。──爱迪生
问题场景:
一个thymeleaf项目,上传图片、视频是直接使用Java代码保存到服务器上
于是服务器压力激增,网页静态资源变得卡顿
于是
我们需要将图片、视频上传移植到阿里云OSS上
阿里云对象存储OSS(Object Storage Service)是阿里云提供的海量、安全、低成本、高持久的云存储服务。
一句话描述:它是一个很棒的存取文件的在线服务器
我们可以使用它进行客户端上传,文件不通过服务端也可以上传,这样减轻了我们服务端压力
我们需要一系列配置才可以对接完成,查阅阿里云OSS官方文档发现:JavaScript客户端签名直传的方式最为简单,但这种方式是有弊端的,客户端通过JavaScript把存取文件的认证信息写在代码里面有泄露的风险
因此
我们采用服务端签名后直传的方式进行上传文件,我们待会儿介绍~
准备工作:
登录阿里云官网。
将鼠标移至产品,单击对象存储 OSS,打开 OSS 产品详情页面。
在 OSS 产品详情页,单击立即开通。
开通服务后,在 OSS 产品详情页单击管理控制台直接进入 OSS 管理控制台界面。
您也可以单击位于官网首页右上方菜单栏的控制台,进入阿里云管理控制台首页,然后单击左侧的对象存储 OSS 菜单进入 OSS 管理控制台界面。
根据官方文档提供步骤视频可以完成开通、创建Bucket、进行授权、配置跨域等
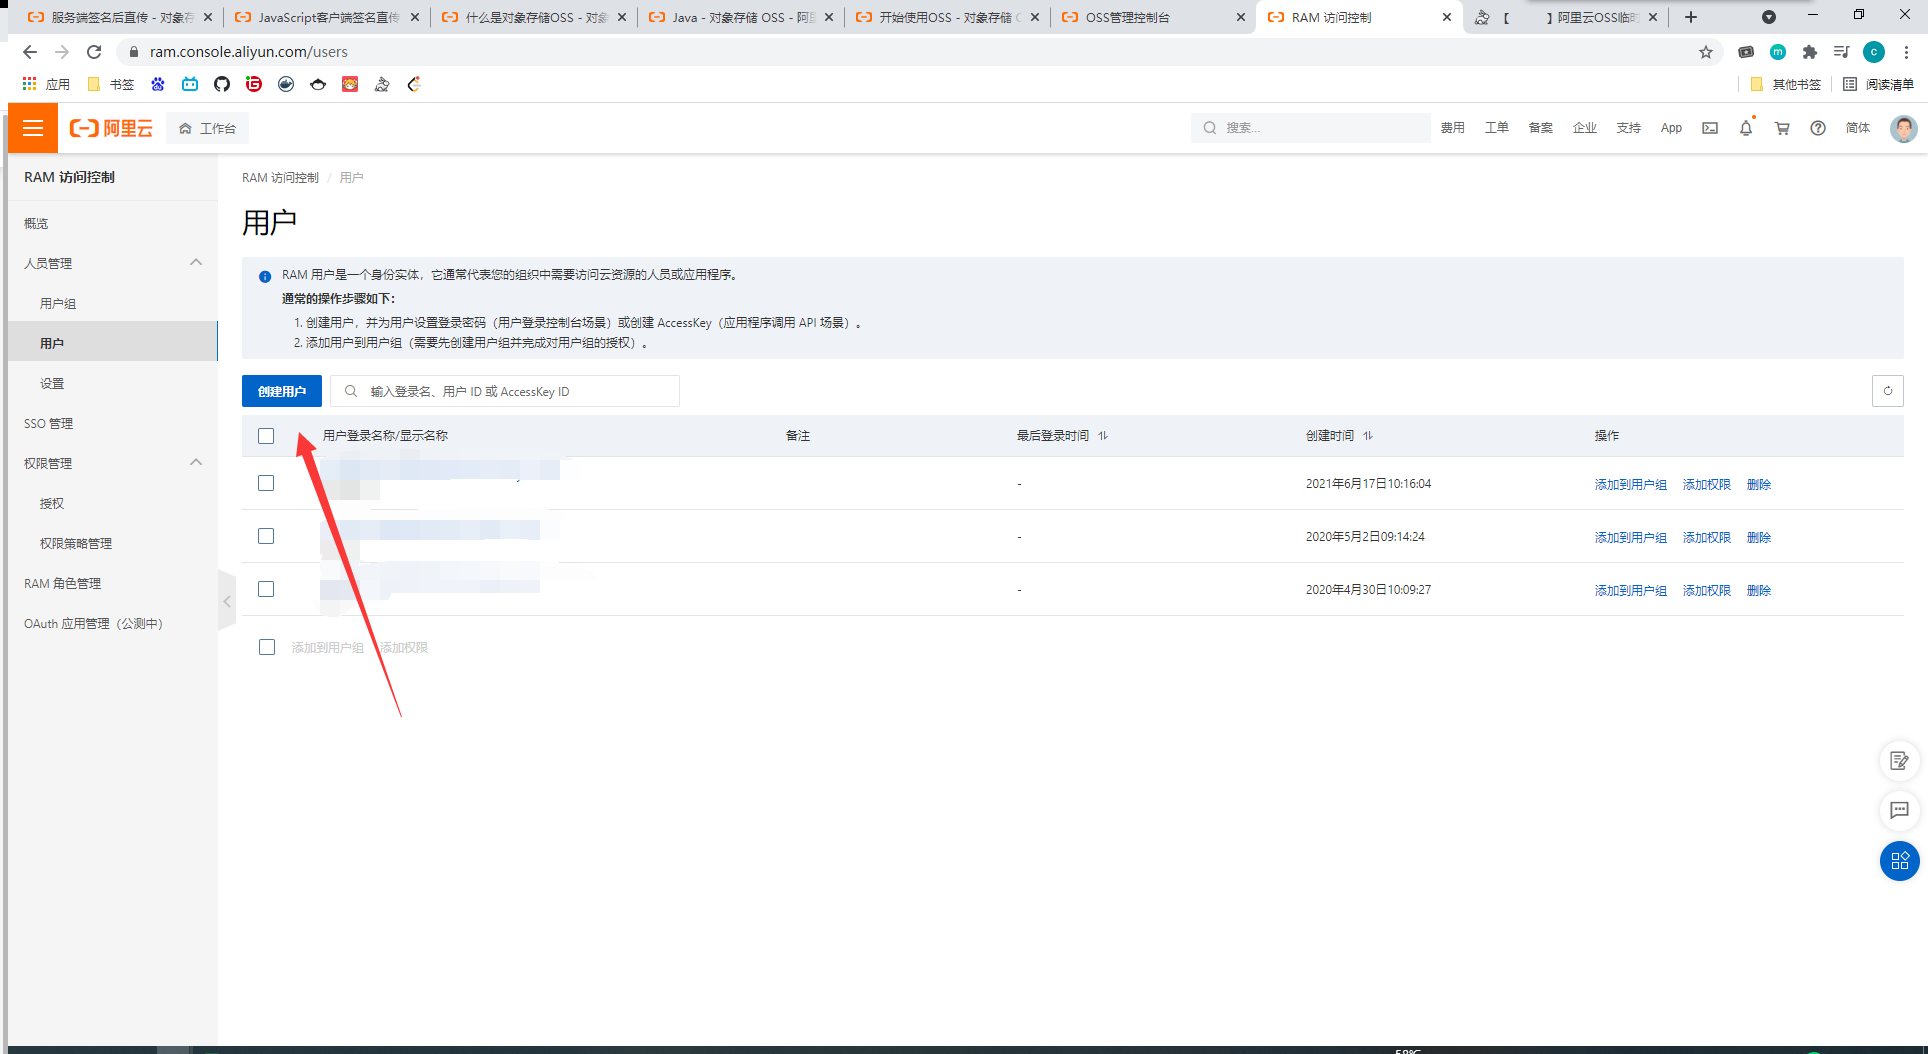
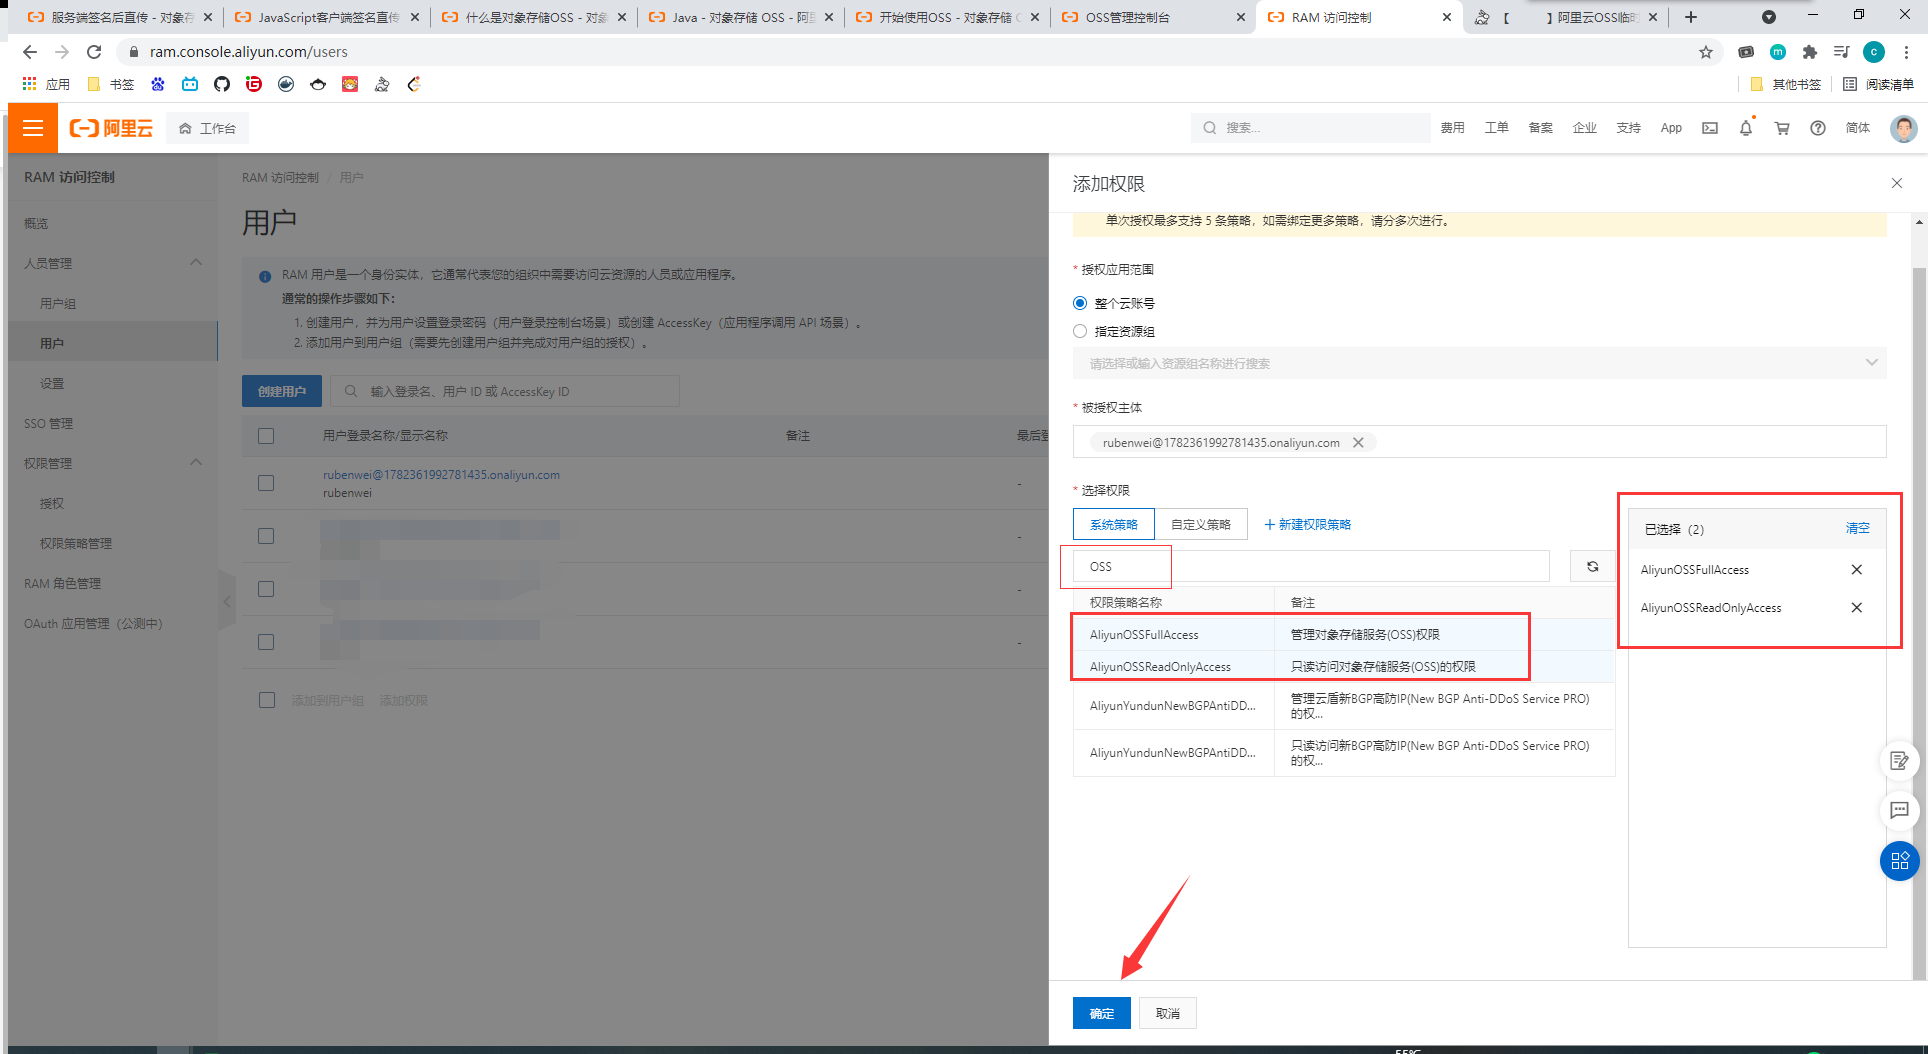
我们到阿里云RAM访问控制台来添加一个用户
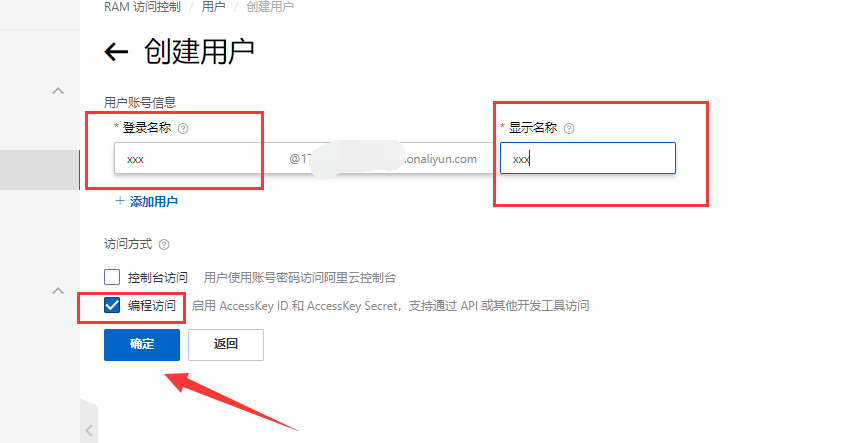
填入用户账号信息、勾选编程访问后点击确定
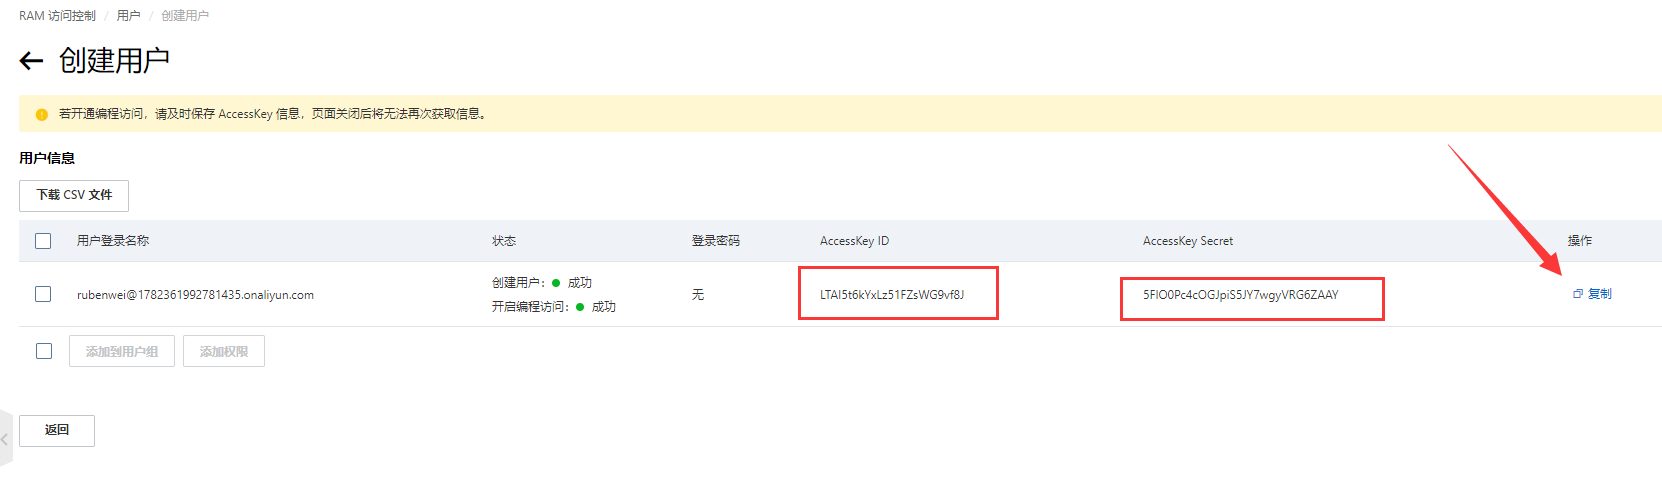
然后我们点击复制,找个地方粘贴下来我们的AccessKey ID以及AccessKey Secret
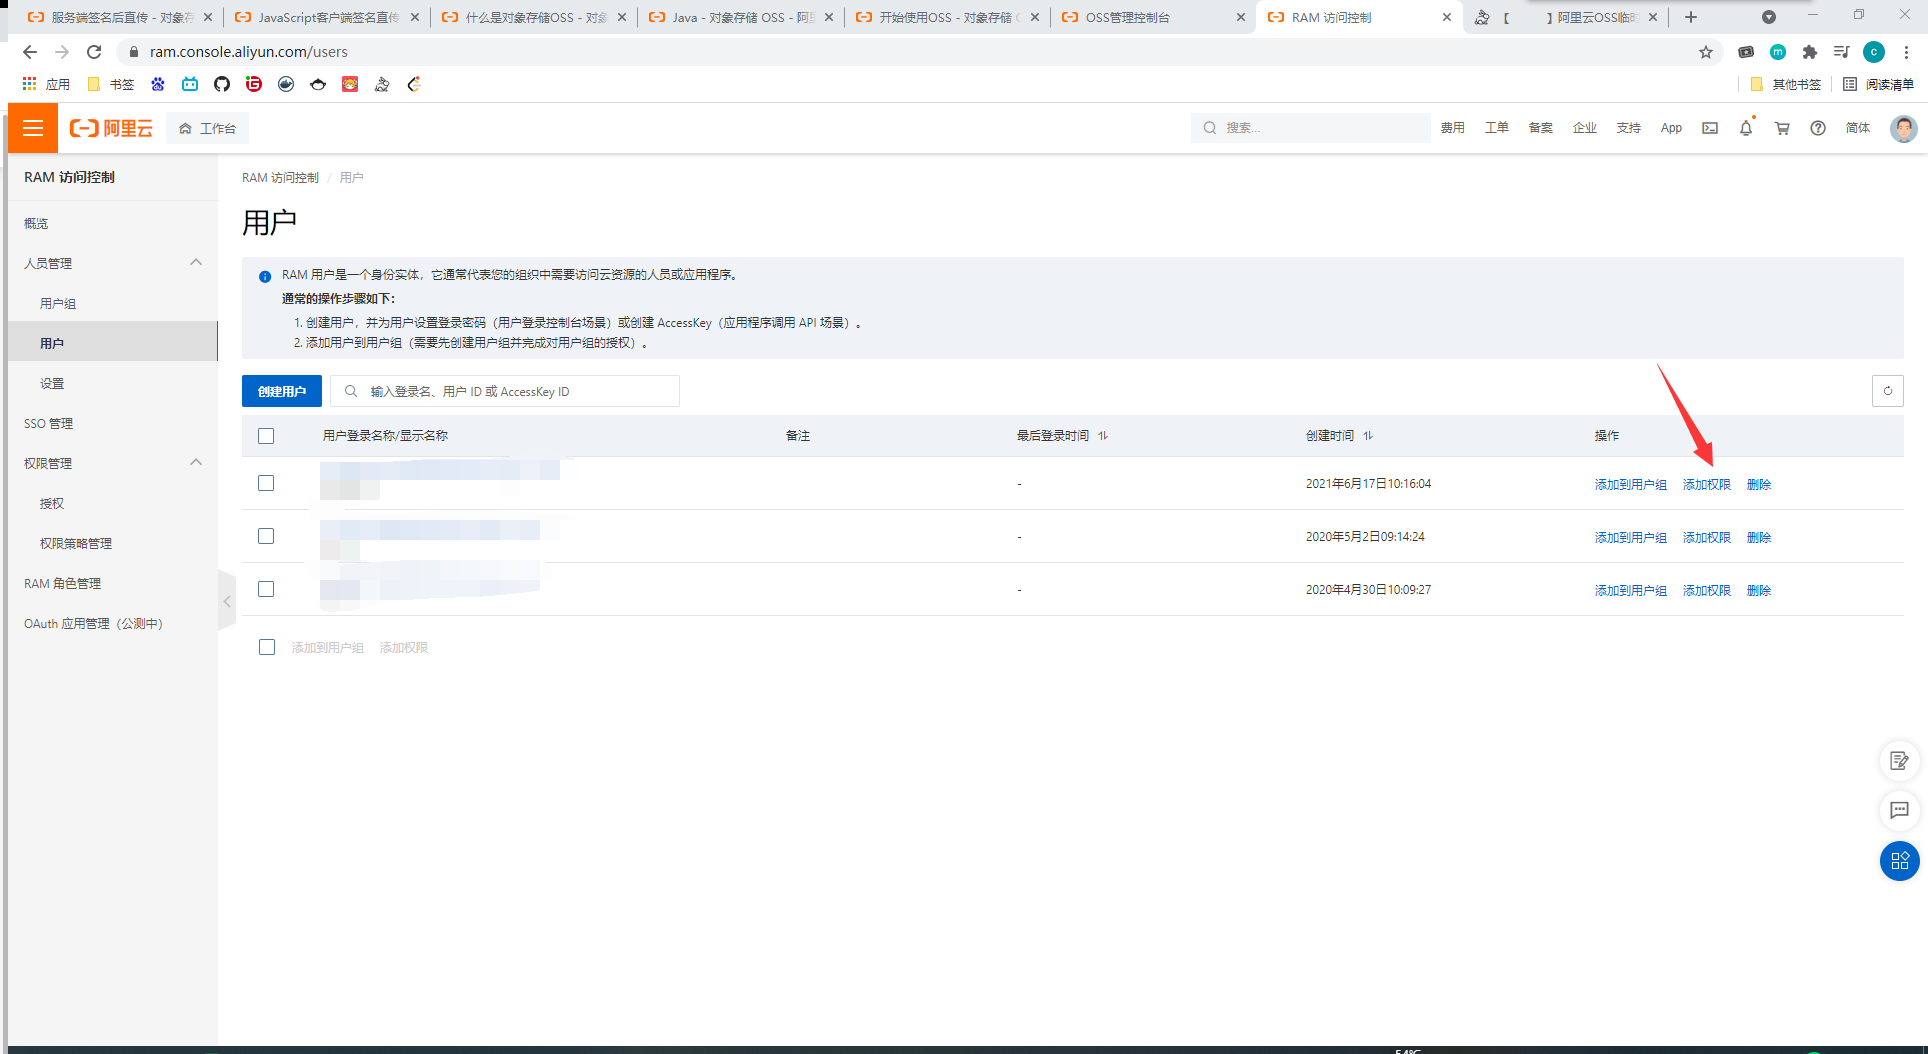
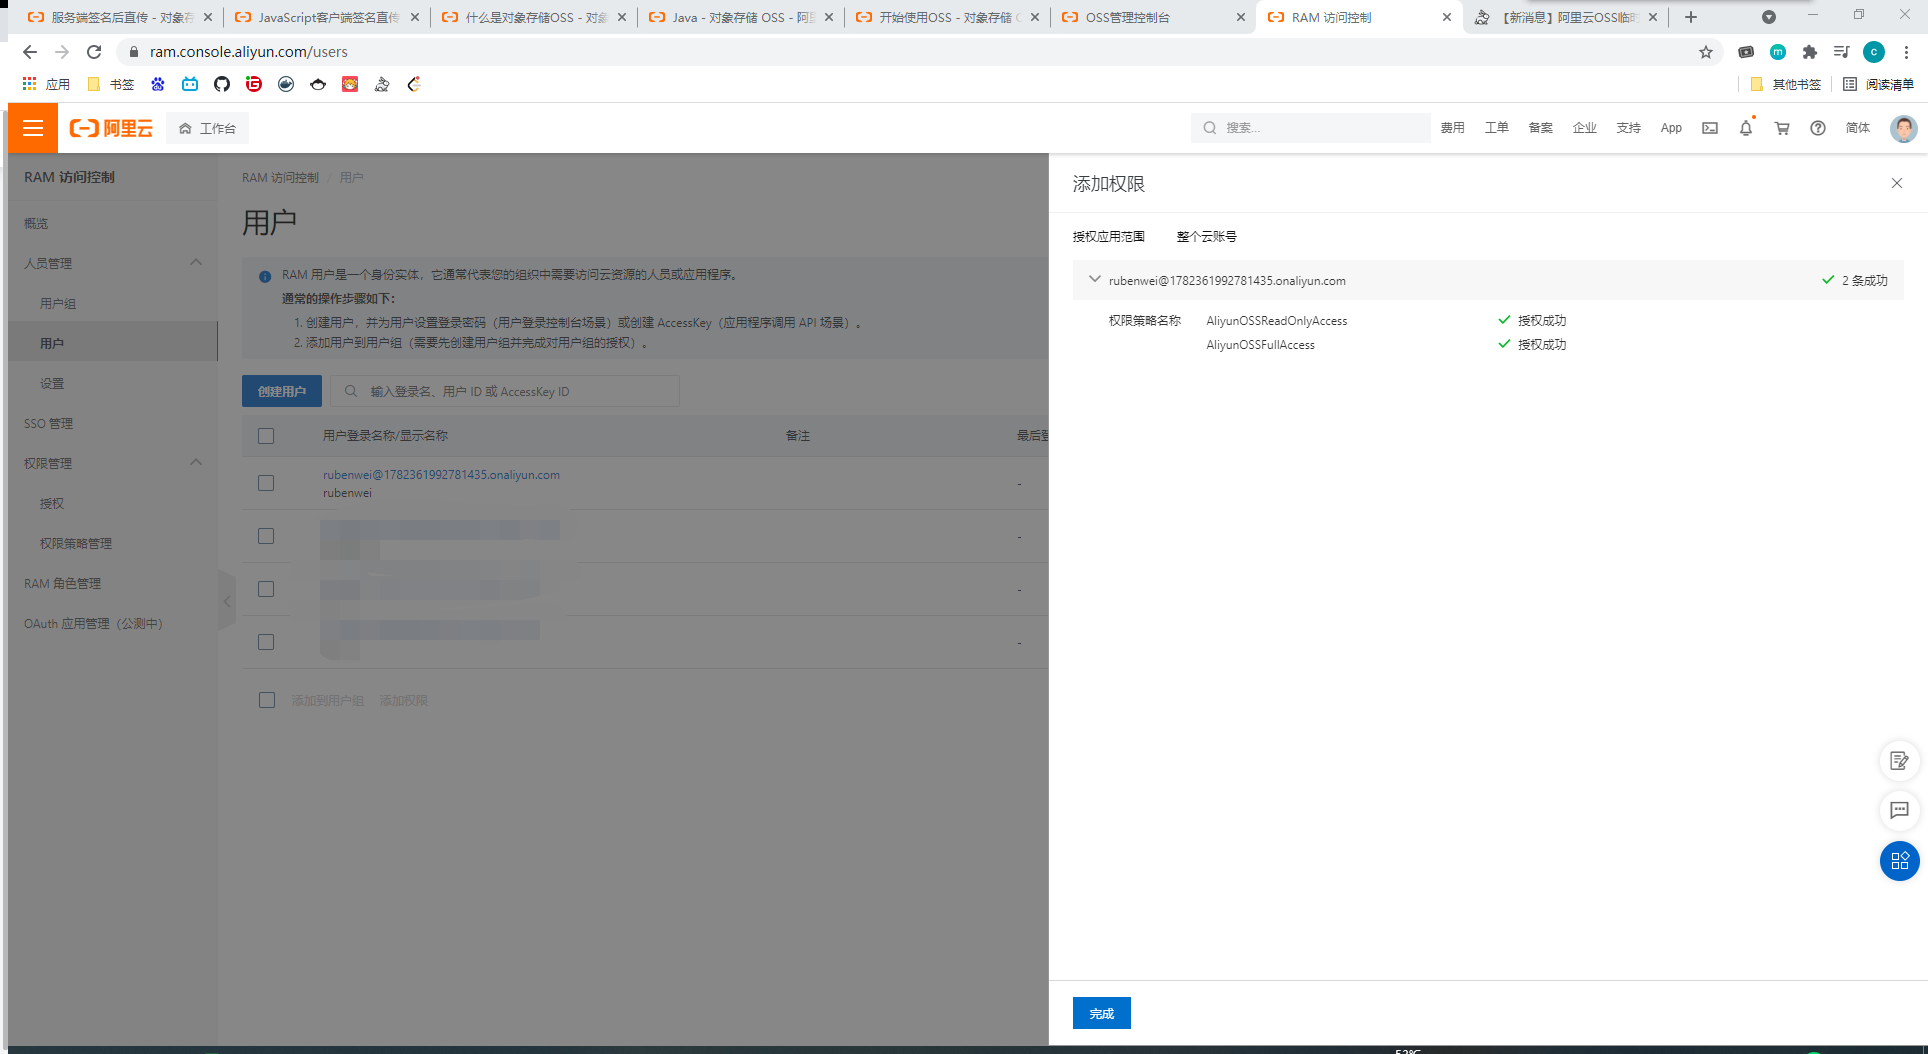
然后我们点击添加权限为该用户授权
开始对接
官方文档流程图片:
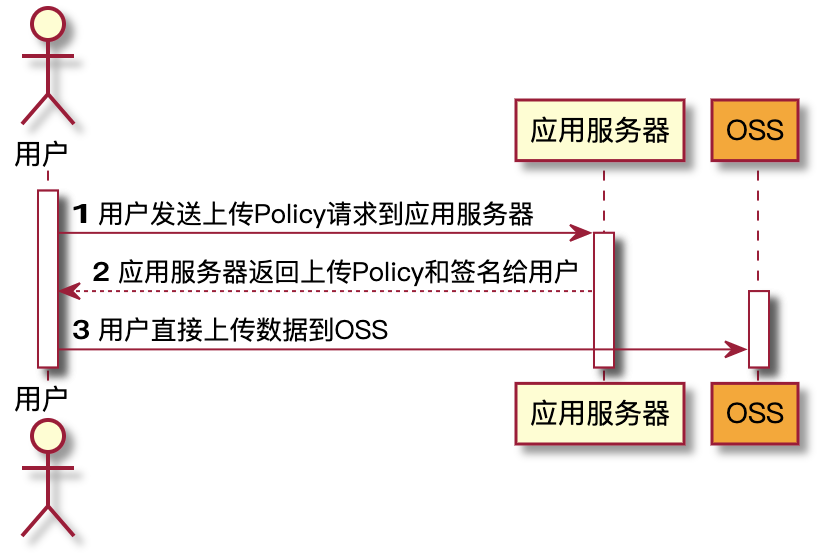
这里可以这么理解:
假设小王接到老板的任务:将这堆货物放到仓库中去,但仓库大门的门禁需要门卡
所以上图中的类比
1:小王去保管室拿门卡
2:小王拿到门卡回来
3:小王搬运货物到仓库,存放货物
因此我们首先先做“保管室”的功能
后端代码实现
这里就是用我们的Java代码在服务端实现:
引入alicloud-oss的依赖
1
2
3
4
5
| <dependency>
<groupId>com.alibaba.cloud</groupId>
<artifactId>spring-cloud-starter-alicloud-oss</artifactId>
<version>2.2.0.RELEASE</version>
</dependency>
|
application.yml,注意版本或者依赖不同,配置有可能改变,例如我最下面的Demo使用的boot的依赖(配置方式发生了变化,不过我们代码都还是一样的,只是注意@Value需要写对)
1
2
3
4
5
6
7
8
| spring:
cloud:
alicloud:
access-key: <你的AccessKey>
secret-key: <你的SecretKey>
oss:
endpoint: <你的endpoint(可以在你的OSS控制台概览看到)>
bucket: <你的bucket(可以在你的OSS控制台概览看到)>
|
Controller
1
2
3
4
5
6
7
8
9
10
11
12
13
14
15
16
17
18
19
20
21
22
23
24
25
26
27
28
29
30
31
| package com.ruben.simpleoss.controller;
import com.ruben.simpleoss.service.OssService;
import org.springframework.web.bind.annotation.GetMapping;
import org.springframework.web.bind.annotation.RestController;
import javax.annotation.Resource;
import java.util.Map;
@RestController
public class UploadController {
@Resource
private OssService ossService;
@GetMapping("oss")
public Map<String, Object> oss() {
return ossService.getMark();
}
}
|
Service
1
2
3
4
5
6
7
8
9
10
11
12
13
| package com.ruben.simpleoss.service;
import java.util.Map;
public interface OssService {
Map<String, Object> getMark();
}
|
ServiceImpl
1
2
3
4
5
6
7
8
9
10
11
12
13
14
15
16
17
18
19
20
21
22
23
24
25
26
27
28
29
30
31
32
33
34
35
36
37
38
39
40
41
42
43
44
45
46
47
48
49
50
51
52
53
54
55
56
57
58
59
60
61
62
63
64
65
66
67
68
69
70
71
72
73
74
75
76
77
78
79
80
81
82
| package com.ruben.simpleoss.service.impl;
import com.aliyun.oss.OSS;
import com.aliyun.oss.common.utils.BinaryUtil;
import com.aliyun.oss.model.MatchMode;
import com.aliyun.oss.model.PolicyConditions;
import com.ruben.simpleoss.service.OssService;
import org.springframework.beans.factory.annotation.Value;
import org.springframework.stereotype.Service;
import javax.annotation.Resource;
import java.nio.charset.StandardCharsets;
import java.text.SimpleDateFormat;
import java.util.Date;
import java.util.HashMap;
import java.util.LinkedHashMap;
import java.util.Map;
@Service
public class OssServiceImpl implements OssService {
@Resource
OSS ossClient;
@Value("${spring.cloud.alicloud.oss.endpoint}")
private String endpoint;
@Value("${spring.cloud.alicloud.oss.bucket}")
private String bucket;
@Value("${spring.cloud.alicloud.access-key}")
private String accessId;
@Override
public Map<String, Object> getMark() {
String host = "https://" + bucket + "." + endpoint;
String format = new SimpleDateFormat("yyyy-MM-dd").format(new Date());
String dir = format + "/";
Map<String, String> respMap = null;
try {
long expireTime = 3000;
long expireEndTime = System.currentTimeMillis() + expireTime * 1000;
Date expiration = new Date(expireEndTime);
PolicyConditions policyConds = new PolicyConditions();
policyConds.addConditionItem(PolicyConditions.COND_CONTENT_LENGTH_RANGE, 0, 1048576000);
policyConds.addConditionItem(MatchMode.StartWith, PolicyConditions.COND_KEY, dir);
String postPolicy = ossClient.generatePostPolicy(expiration, policyConds);
byte[] binaryData = postPolicy.getBytes(StandardCharsets.UTF_8);
String encodedPolicy = BinaryUtil.toBase64String(binaryData);
String postSignature = ossClient.calculatePostSignature(postPolicy);
respMap = new LinkedHashMap<String, String>(8);
respMap.put("accessid", accessId);
respMap.put("policy", encodedPolicy);
respMap.put("signature", postSignature);
respMap.put("dir", dir);
respMap.put("host", host);
respMap.put("expire", String.valueOf(expireEndTime / 1000));
} catch (Exception e) {
System.out.println(e.getMessage());
} finally {
ossClient.shutdown();
}
Map<String, Object> result = new HashMap<>(4);
result.put("data", respMap);
result.put("code", 20000);
return result;
}
}
|
然后我们运行访问一下,就像第一步小王去拿门卡了
可以看到拿到我们的临时凭证了,就像第二步小王拿着门卡回来了

然后我们现在要拿着这些凭证去上传文件,就像第三步小王要去存货物
按照PostObject的文档测试一下
上传完成之后我们这里是没有回调的,因为我们这里没有配置callback,如有需要,可以查看Callback文档
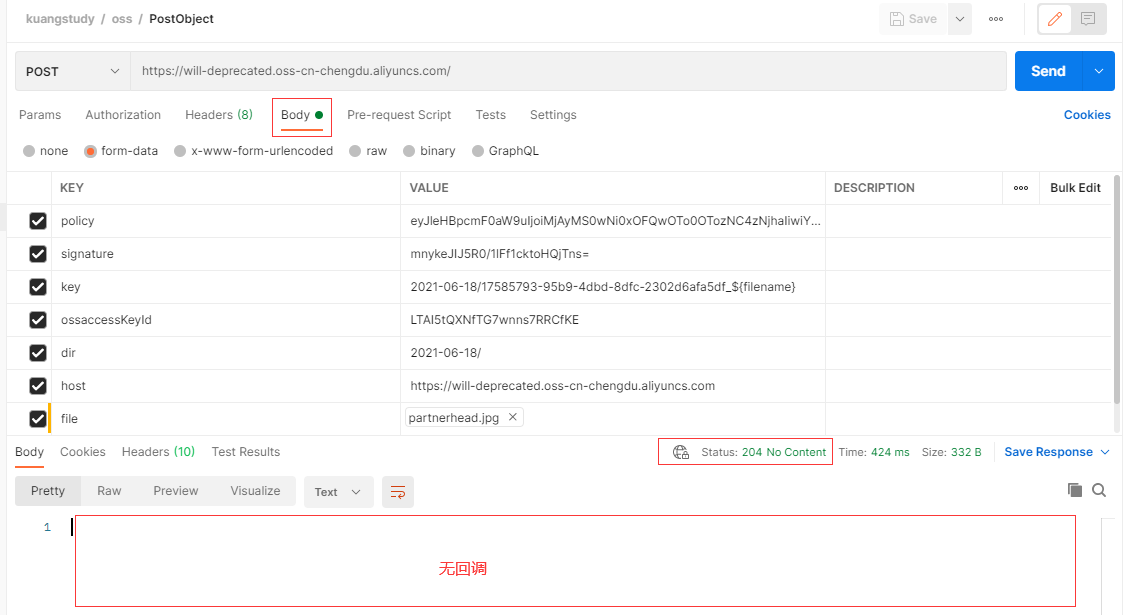
上传完成之后我们可以在控制台看到我们上传的文件
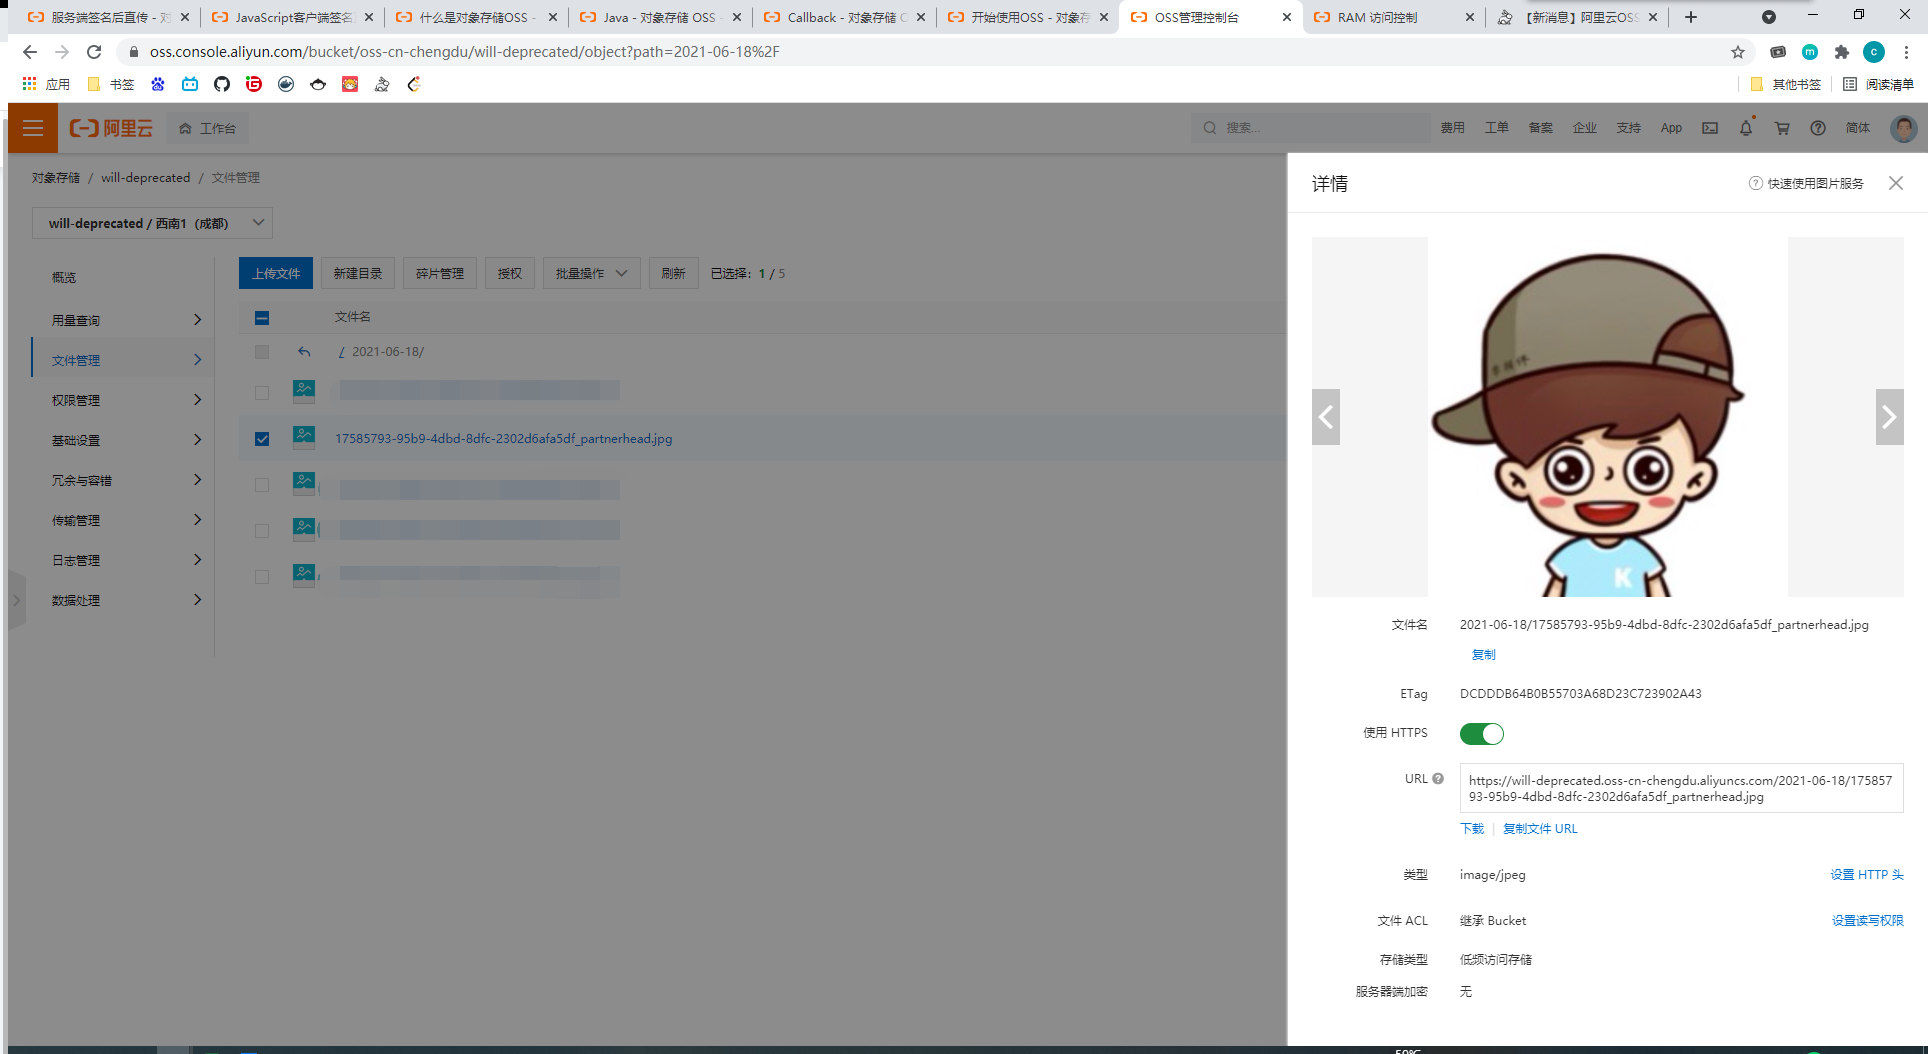
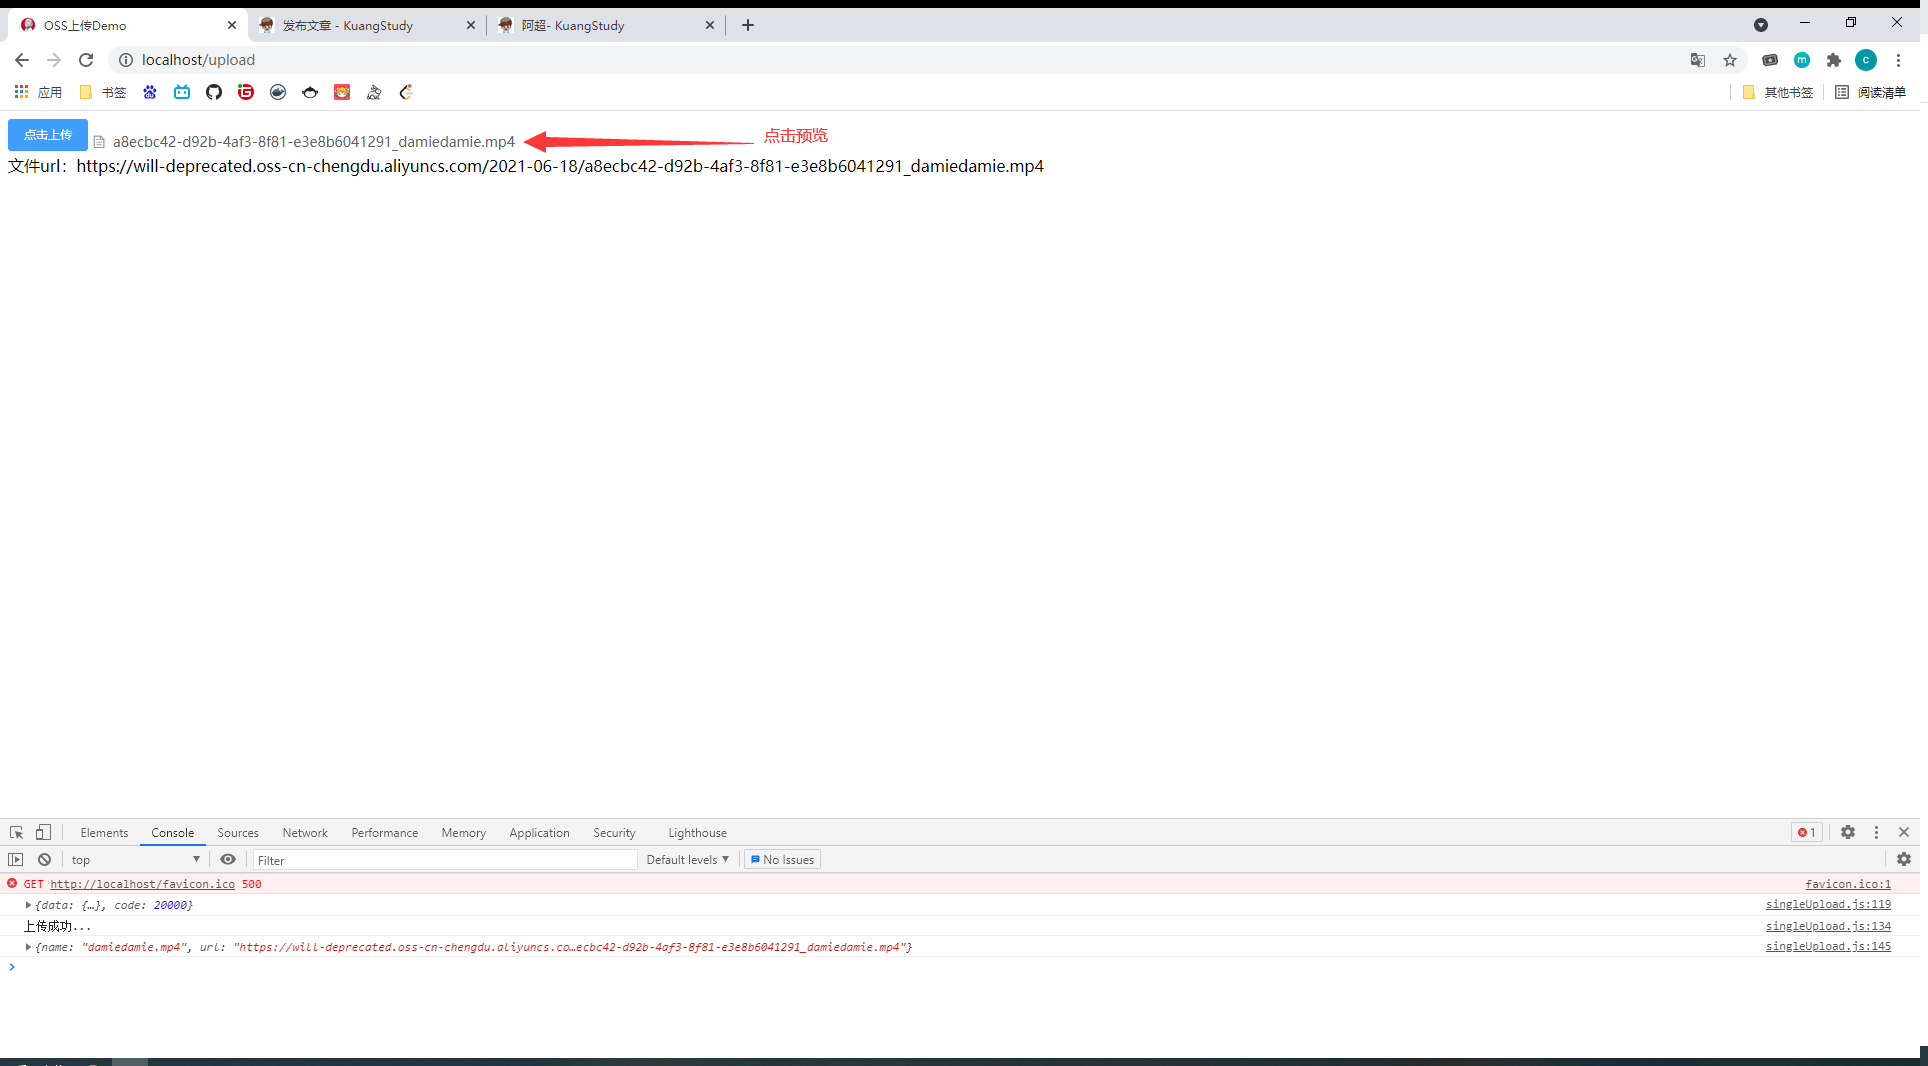
然后如果我们在代码里使用文件的url的话,就使用host+/+(key替换掉${filename}占位符为文件名)即可
例如我的host是https://will-deprecated.oss-cn-chengdu.aliyuncs.com
加上/再加上key为:2021-06-18/17585793-95b9-4dbd-8dfc-2302d6afa5df_${filename}替换掉文件名就是2021-06-18/17585793-95b9-4dbd-8dfc-2302d6afa5df_partnerhead.jpg(其实我测试过了,不用${filename}占位符,直接使用文件名也可以上传成功)
最终https://will-deprecated.oss-cn-chengdu.aliyuncs.com/2021-06-18/17585793-95b9-4dbd-8dfc-2302d6afa5df_partnerhead.jpg则是我们完整的文件路径
前端代码实现
使用html+vue
主页面,引用组件的地方
1
2
3
4
5
6
7
8
9
10
11
12
13
14
15
16
17
18
19
20
21
22
23
24
25
26
| <!DOCTYPE html>
<html lang="en">
<head>
<meta charset="UTF-8">
<title>OSS上传Demo</title>
<link href="/css/elementUI.css" rel="stylesheet">
<script src="/js/jquery-3.5.1.min.js"></script>
<script src="/js/vue.min.js"></script>
<script src="/js/elementUI.js"></script>
<script src="/js/singleUpload.js"></script>
</head>
<body>
<div id="myapp">
<single-upload ref="singleUpload" v-model="imageUrl"></single-upload>
文件url:{ {imageUrl} }
</div>
<script>
new Vue({
el: '#myapp',
data: {
imageUrl: ''
}
})
</script>
</body>
</html>
|
自己写的组件:
1
2
3
4
5
6
7
8
9
10
11
12
13
14
15
16
17
18
19
20
21
22
23
24
25
26
27
28
29
30
31
32
33
34
35
36
37
38
39
40
41
42
43
44
45
46
47
48
49
50
51
52
53
54
55
56
57
58
59
60
61
62
63
64
65
66
67
68
69
70
71
72
73
74
75
76
77
78
79
80
81
82
83
84
85
86
87
88
89
90
91
92
93
94
95
96
97
98
99
100
101
102
103
104
105
106
107
108
109
110
111
112
113
114
115
116
117
118
119
120
121
122
123
124
125
126
127
128
129
130
131
132
133
134
135
136
137
138
139
140
141
142
143
144
145
146
147
148
| function policy() {
return new Promise((resolve, reject) => {
$.ajax({
url: '/oss',
type: 'GET',
contentType: 'application/json; charset=UTF-8',
success: function (res) {
if (res.code == 20000) {
resolve(res)
} else {
reject(res)
}
},
error: function (res) {
reject(res)
}
});
});
}
Vue.component('singleUpload', {
props: ['value'],
template: ' <div class="single-upload">' +
' <el-upload' +
' :before-upload="beforeUpload"' +
' :data="dataObj"' +
' :file-list="fileList"' +
' :multiple="false"' +
' :on-preview="handlePreview"' +
' :on-remove="handleRemove"' +
' :on-success="handleUploadSuccess"' +
' :show-file-list="showFileList"' +
' :action="dataObj.host"' +
' list-type="text"' +
' style="display: flex;"' +
' >' +
' <el-button size="small" type="primary">点击上传</el-button>' +
' </el-upload>' +
' <el-dialog :modal="false" :visible.sync="dialogVisible">' +
' <img width="100%;" v-if="isImg(fileList[0].url)" :src="fileList[0].url" alt="图片找不到了..."/>' +
' <video width="900px" controls autoplay muted v-if="isVideo(fileList[0].url)" :src="fileList[0].url" alt="视频找不到了..."/>' +
' </el-dialog>' +
' </div>',
data() {
return {
dataObj: {
policy: "",
signature: "",
key: "",
ossaccessKeyId: "",
dir: "",
host: ""
},
dialogVisible: false
};
},
computed: {
imageUrl() {
return this.value;
},
imageName() {
if (this.value != null && this.value !== "") {
return this.value.substr(this.value.lastIndexOf("/") + 1);
} else {
return null;
}
},
fileList() {
return [
{
name: this.imageName,
url: this.imageUrl
}
];
},
showFileList: {
get: function () {
return (
this.value !== null && this.value !== "" && this.value !== undefined
);
},
set: function (newValue) {
}
}
},
methods: {
isVideo() {
let fileType = this.getFileType()
return ~['.mp4', '.avi'].indexOf(fileType)
},
isImg() {
let fileType = this.getFileType()
return ~['.png', '.jpg', '.jpeg', '.gif'].indexOf(fileType)
},
getFileType() {
let fileType = this.value.substring(this.value.lastIndexOf('.'))
return fileType
},
getUUID() {
return 'xxxxxxxx-xxxx-4xxx-yxxx-xxxxxxxxxxxx'.replace(/[xy]/g, c => {
return (c === 'x' ? (Math.random() * 16 | 0) : ('r&0x3' | '0x8')).toString(16)
})
},
emitInput(val) {
this.$emit("input", val);
},
handleRemove(file, fileList) {
this.emitInput("");
},
handlePreview(file) {
this.dialogVisible = true;
},
beforeUpload(file) {
let _self = this;
return new Promise((resolve, reject) => {
policy()
.then(response => {
console.log(response)
_self.dataObj.policy = response.data.policy;
_self.dataObj.signature = response.data.signature;
_self.dataObj.ossaccessKeyId = response.data.accessid;
_self.dataObj.key = response.data.dir + this.getUUID() + "_${filename}";
_self.dataObj.dir = response.data.dir;
_self.dataObj.host = response.data.host;
resolve(true);
})
.catch(err => {
reject(false);
});
});
},
handleUploadSuccess(res, file) {
console.log("上传成功...");
this.showFileList = true;
this.fileList.pop();
this.fileList.push({
name: file.name,
url:
this.dataObj.host +
"/" +
this.dataObj.key.replace("${filename}", file.name)
});
this.emitInput(this.fileList[0].url);
console.log(this.fileList[0]);
}
}
})
|
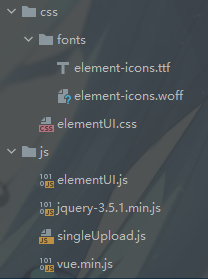
注意引入一些文件:
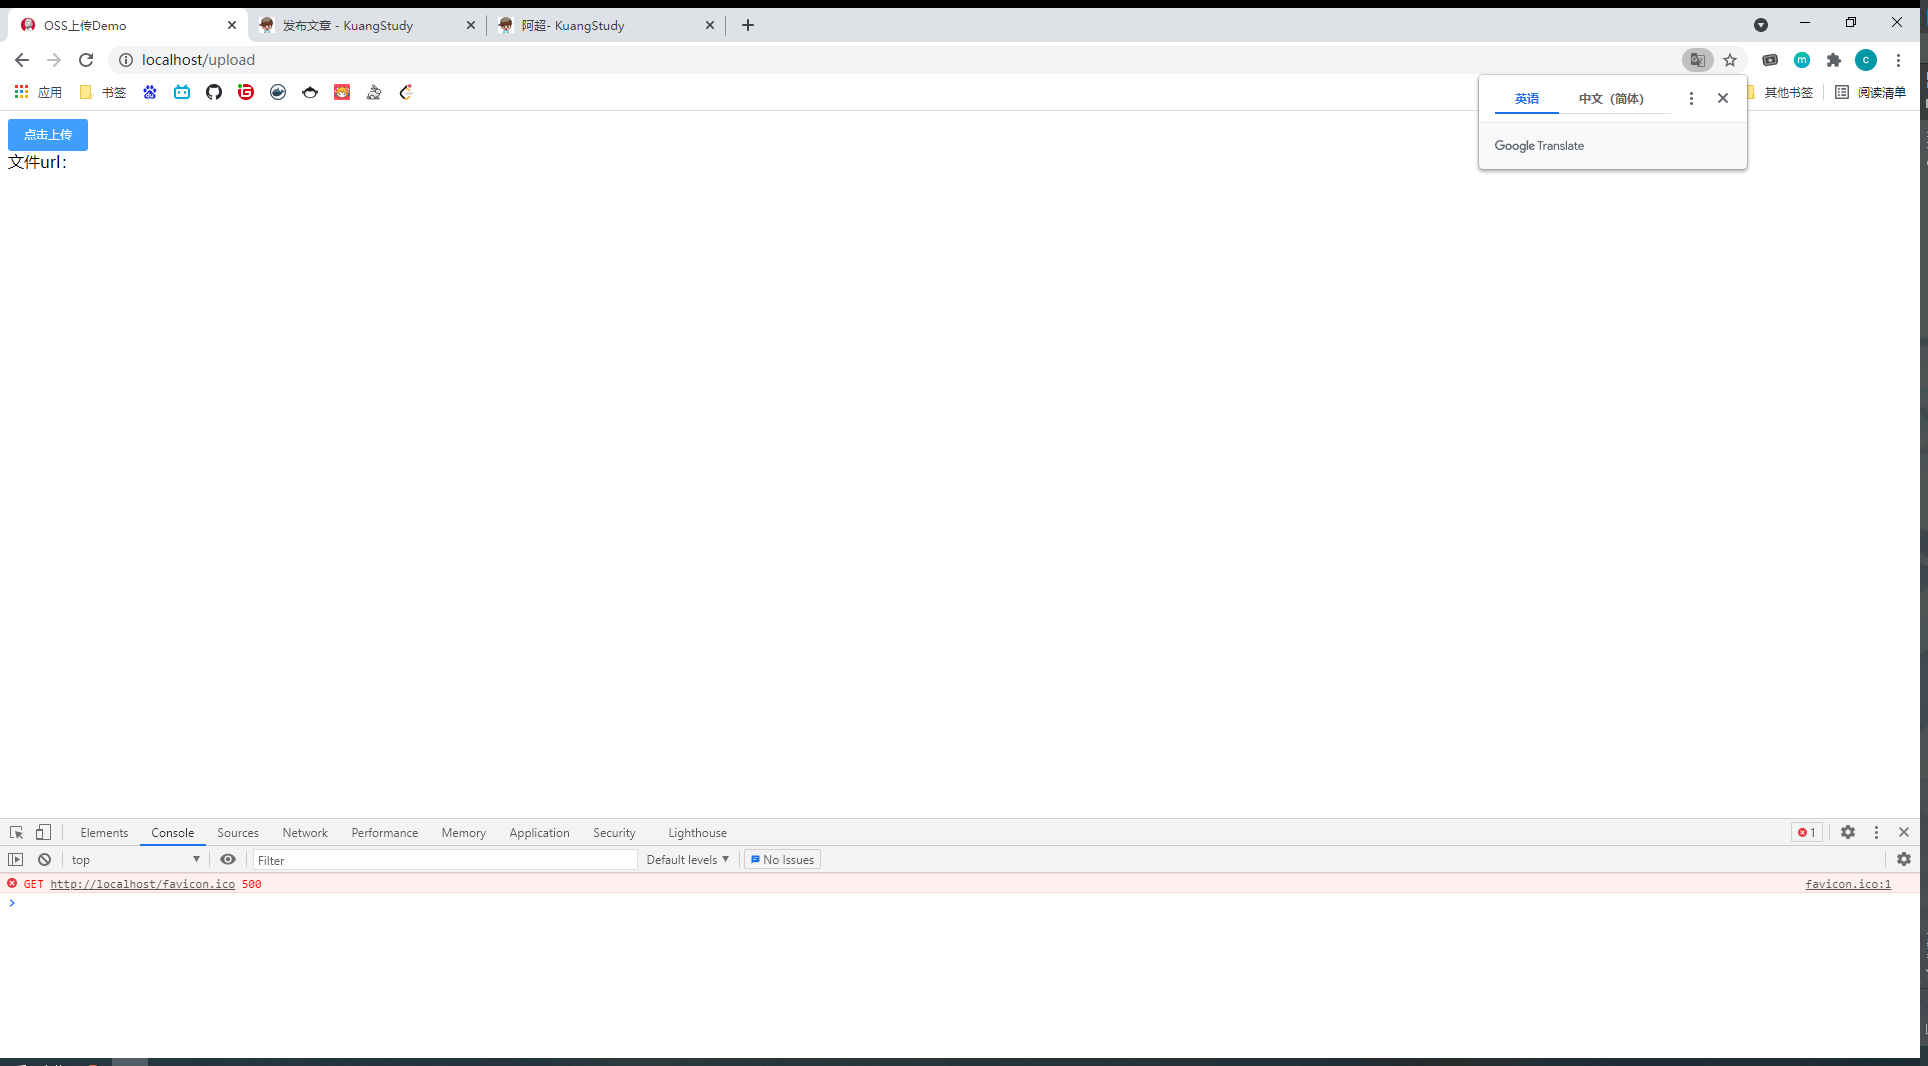
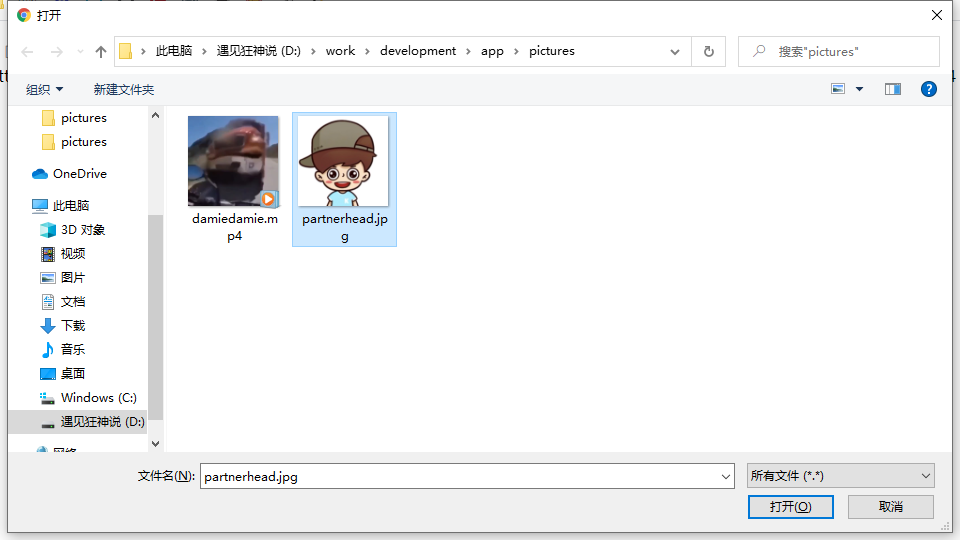
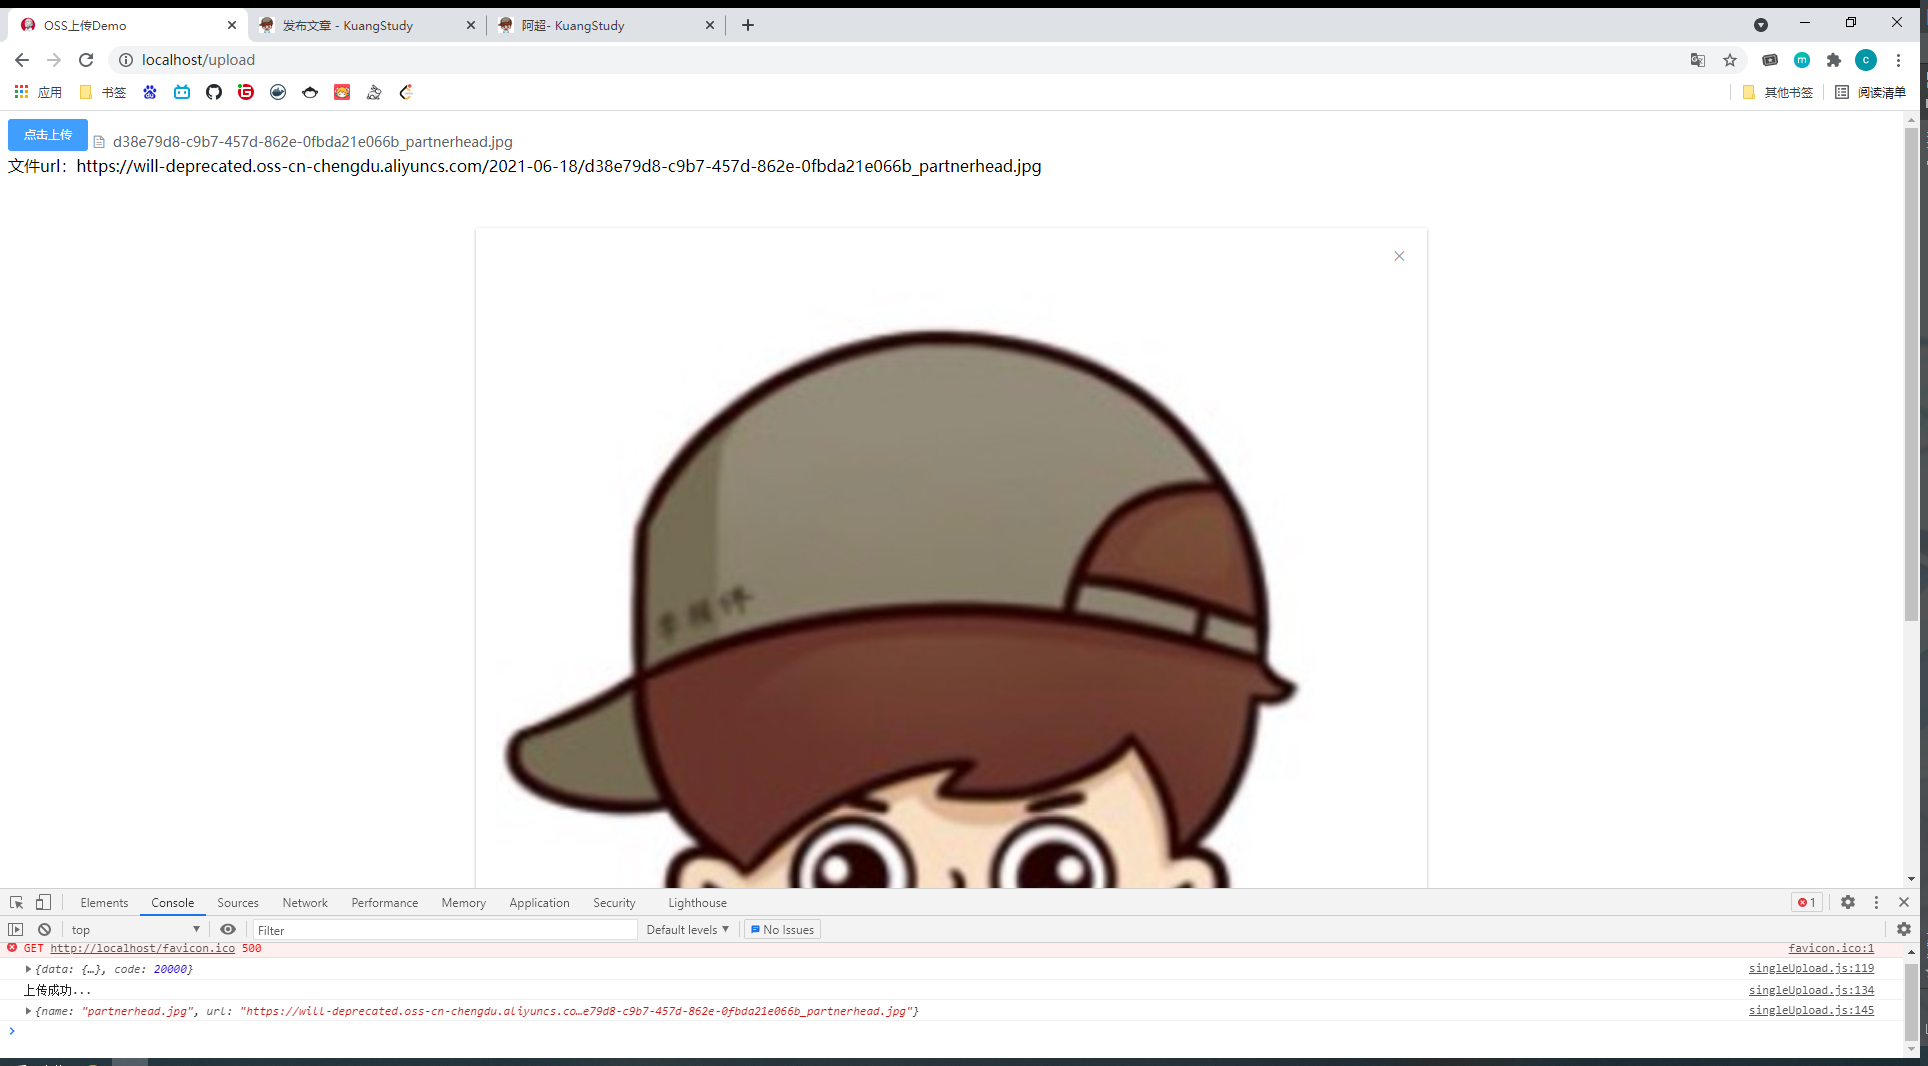
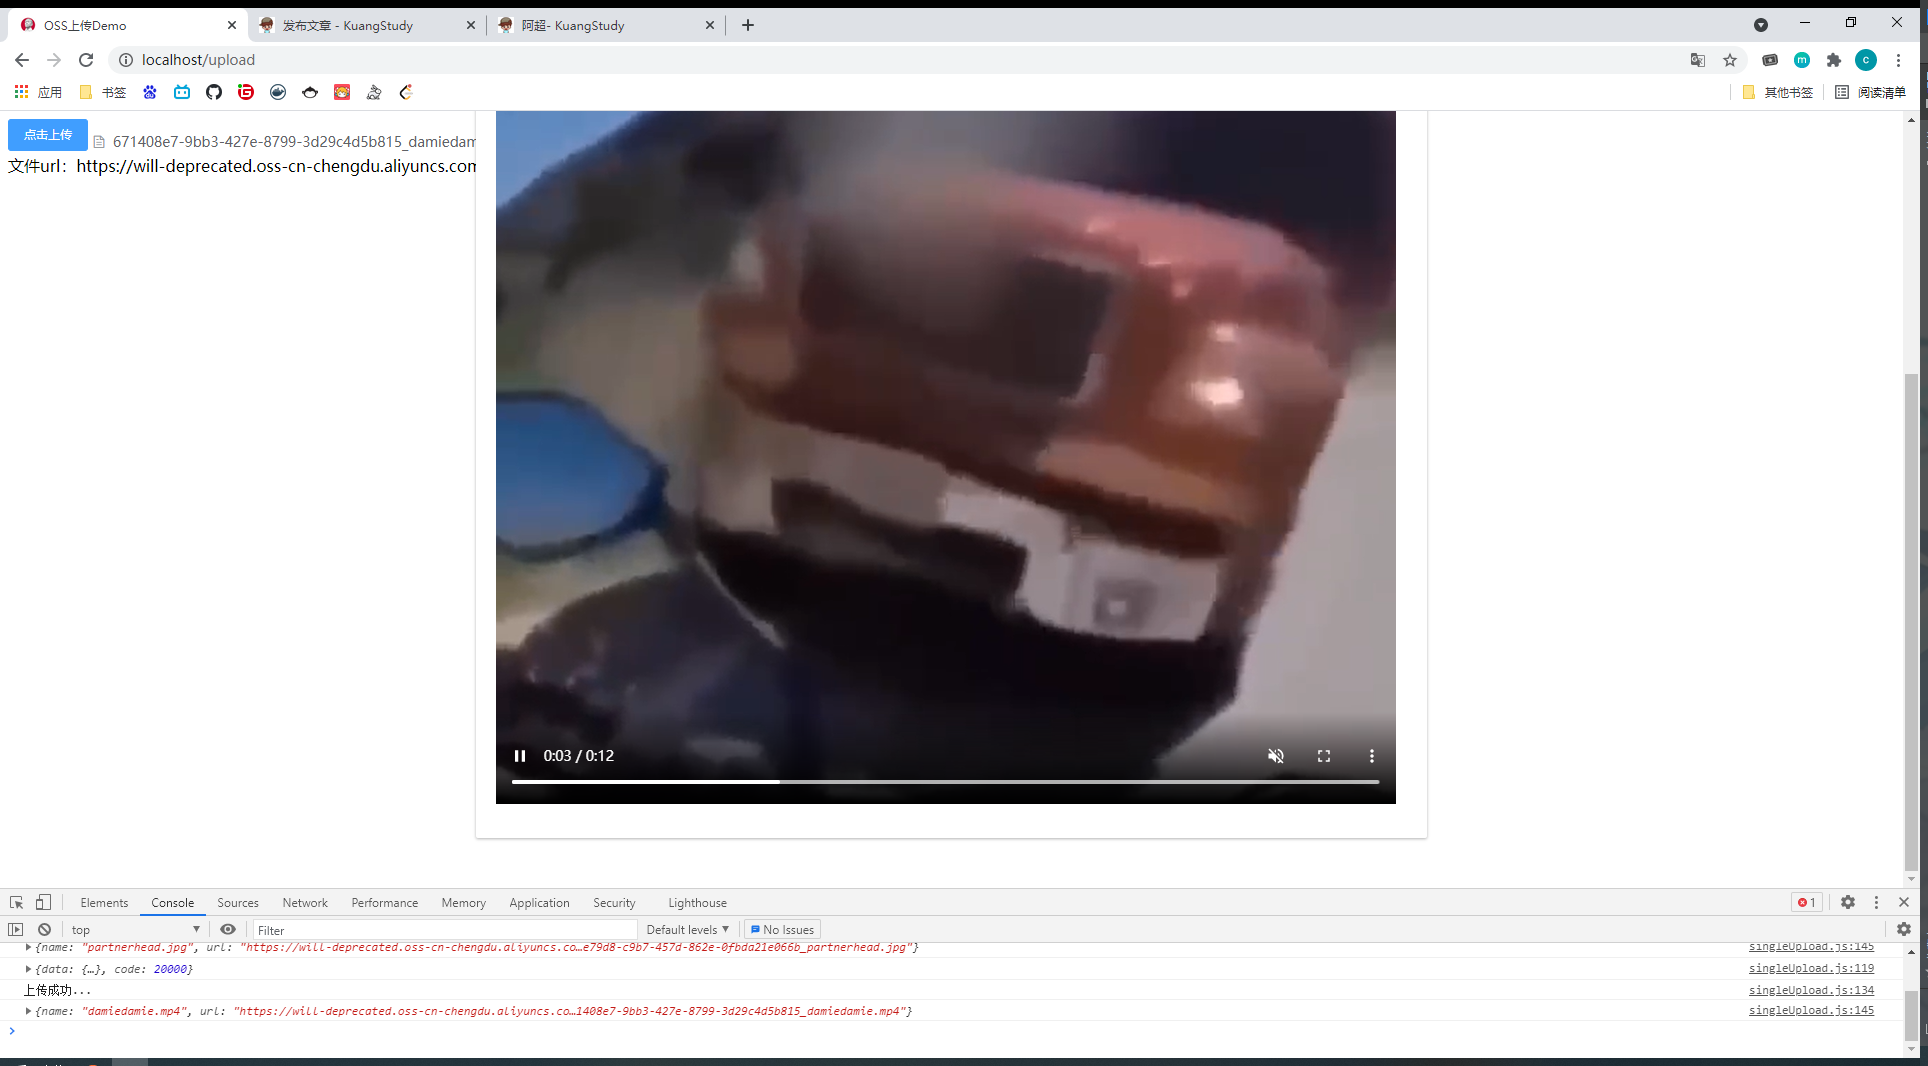
最终效果:
项目源码
本次案例完整项目代码:https://gitee.com/VampireAchao/simple-oss.git
这个项目基本能应对绝大部分场景,它那次请求签证接口是使用的jQuery的ajax
如果您是纯vue项目,可以看我以往这个项目https://gitee.com/VampireAchao/my-vue-app.git
小结
通过对这次的OSS对接,复习了如何在html页面中引入vue、elementUI、引入vue自定义组件、进行第三方服务接入等…
最后,希望本文能对您有所帮助~